I’m not sure when it happened, but at some point there seemed to be a shift from kale to Brussels sprouts as the coolest vegetable on the block. There wasn’t a specific moment I remember (i.e. some celebrity talking about how they OMG LOVE Brussels!), but when looking at recipes I noticed about a year ago or so that there were suddenly a lot more Brussels sprout recipes than ever before. I can get them as a side instead of french fries at my local burger joint, there are shaved Brussels salads with beets and goat cheese on tons of menus, and I’ve made a delicious Brussels sprout mac ‘n cheese. But I distinctly remember that when growing up Brussels were always the horrible side-dish that every kid dreaded, right? I actually didn’t have them until I was an adult, but always wanted to try them simply because they seemed to be everyone’s least favorite. Naturally I loved them immediately and started incorporating them into my meals whenever possible. So when my sister told me she made an amazing Brussels sprout pizza, I knew I had to give it a try myself.

The pizza is actually really simple, and really delicious. Not to toot my own horn, but I’ve had Brussels sprout pizzas out a few times in the last year or so, and I liked mine the best! Admittedly, I didn’t make my own crust (ain’t nobody got time for that), but the Trader Joe’s dough I bought was good enough for me. I want to make this pizza all the time, and I’m confident you will too!

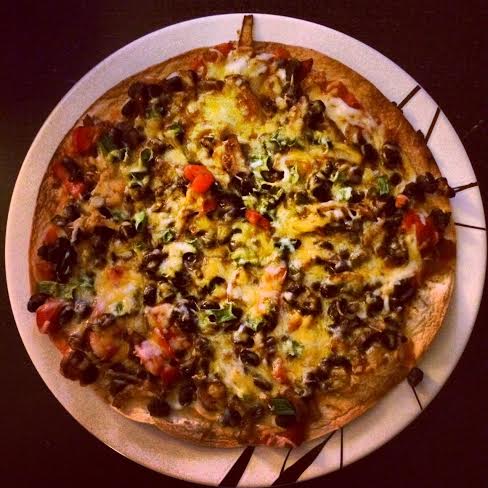
Brussels Sprout + Goat Cheese Pizza
Ingredients:
1 Tbsp olive oil
1 pizza dough/crust (I used Trader Joe’s dough, but anything will work – you can even get fancy and make your own!)
1 cup Brussels sprouts, roughly chopped
1 small yellow onion, diced
1/2 cup shredded mozzarella cheese
4 oz. goat cheese, crumbled
salt + pepper to taste
Directions:
1. Preheat the oven for the pizza dough (i.e. 450 degrees)
2. In a medium sauce pan heat the olive oil and add the onions with a little salt and pepper. If you have the patience, make these caramelized because the flavor will be a million times better. This is going to require you to stir the onions frequently for at least 10-20 minutes.*
3. Once the onions are beginning to brown, add the diced Brussels and toss to make sure they’re coated in the oil. Cook for about 5-10 minutes, until they start to get crispy.
4. Roll out the pizza dough on a floured surface. When ready, add the 1/2 cup mozzarella cheese, followed by the Brussels and onion mixture. Top with the crumbled goat cheese.*
5. Bake for 10-12 minutes or until the crust is golden brown and the cheese is melted.
*NOTES: 1. You don’t have to make the onions caramelized, but the pizza will taste better if you do.
2. If you don’t like goat cheese (blasphemous!), then feta will work well as a replacement


![See? Tank & shorts! [Proud member of #TeamPurple for the #PickyGames!]](https://foodosaurusrex.com/wp-content/uploads/2021/05/31f62-pickyrunner.jpg)