It was starting to feel like fall late last week, so I picked up an acorn squash at the Farmer’s Market on Thursday thinking I could put it to good use this week with the cooler weather. Naturally the temperatures have been in the upper 70’s all week – summer forever, please! – which doesn’t really put me in the mood for a warm fall dish… but I made one anyway. And when I shared it on Instagram and everyone was interested in the recipe, I figured I’d share it with you all!
This comes together pretty easily and it doesn’t require you to do multiple things at once which I always appreciate. I made this as my main dish, but you could easily have it as a side to something else. Acorn squash are great vehicles to stuff with pretty much anything – so get creative!
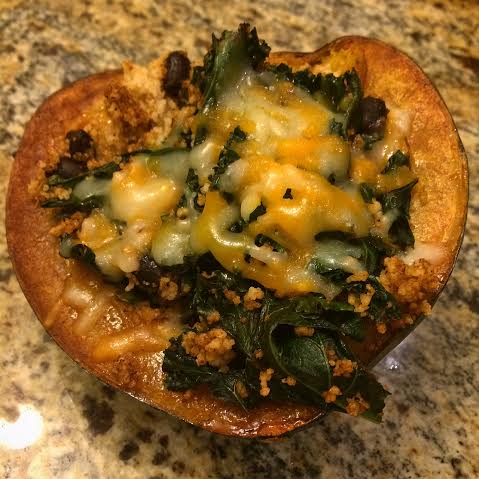
Southwestern Stuffed Acorn Squash
– Serves 2 –
Ingredients:
1 acorn squash
3 cups kale, roughly chopped
1/2 red onion, diced
1/2 can (15oz) black beans
2 cloves garlic, minced
1/2 cup cous cous
1 tbsp oil
1 tbsp chili powder
1/2 tbsp cumin
1 tsp paprika
1/4 tsp oregano
1/4 cup shredded cheese (I used a cheddar blend)
Directions:
1. Preheat oven to 400 degrees
2. Slice the squash in half, remove the seeds. Spray a baking sheet and cut side of the squash with non-stick spray and place the squash cut side down. Bake for 30-35 minutes.
3. Meanwhile, prepare the cous cous by bringing 3/4 cup of salted water to a boil. Add the cous cous, stir, cover and remove from the heat. Fluff after 5 minutes.
4. Heat the tablespoon of oil over medium-high heat. Add the onion and saute for 5 minutes. Add the kale, sauteing for another 5 minutes.
5. Add the garlic, beans, spices (chili powder, cumin, paprika, and oregano). Cook until beans are heated through, about 2 minutes.
6. In a large bowl, combine the kale and bean mixture with the cous cous.
7. When the squash is done, flip them over and spoon the filling into the squash cavity (it’s okay if it’s overflowing). Top with cheese and bake another 2 minutes until the cheese is melted.