Souper Simple: Kale, Tortellini, & Bean Soup

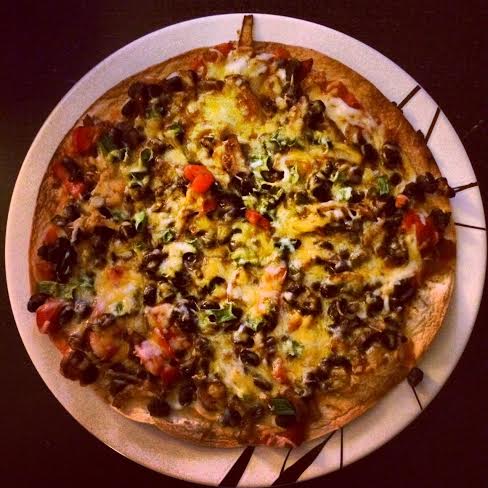
Two recipe posts in one week – look at me go!

Whenever I’m training for something, you can assume that I’m hungry at all times. Since my next (goal) race is the Asbury Park Half at the end of April, training has been getting more intense as each week passes. I’m averaging weekly mileage that I’ve never seen before (40+ miles), so it’s no surprise my appetite has grown to match. So when it comes to my meals (especially dinner), I try to get the most bang for my buck. I always want to make sure I’m eating a decently balanced meal that is quick and easy to prepare. On weekdays where I have to run anywhere from 6 to 10 miles, time is of the essence. Plus, I want to make sure I’m fueling and refueling properly.

Enter this Kale, Tortellini, and Bean soup! It comes together in a matter of minutes, has barely any prep, and can easily be doubled (or more!) and frozen. It’s perfect for a quick weeknight dinner, and even better for lunch!

Tortellini, Kale, & White Bean Soup | FoodosaurusRex.com

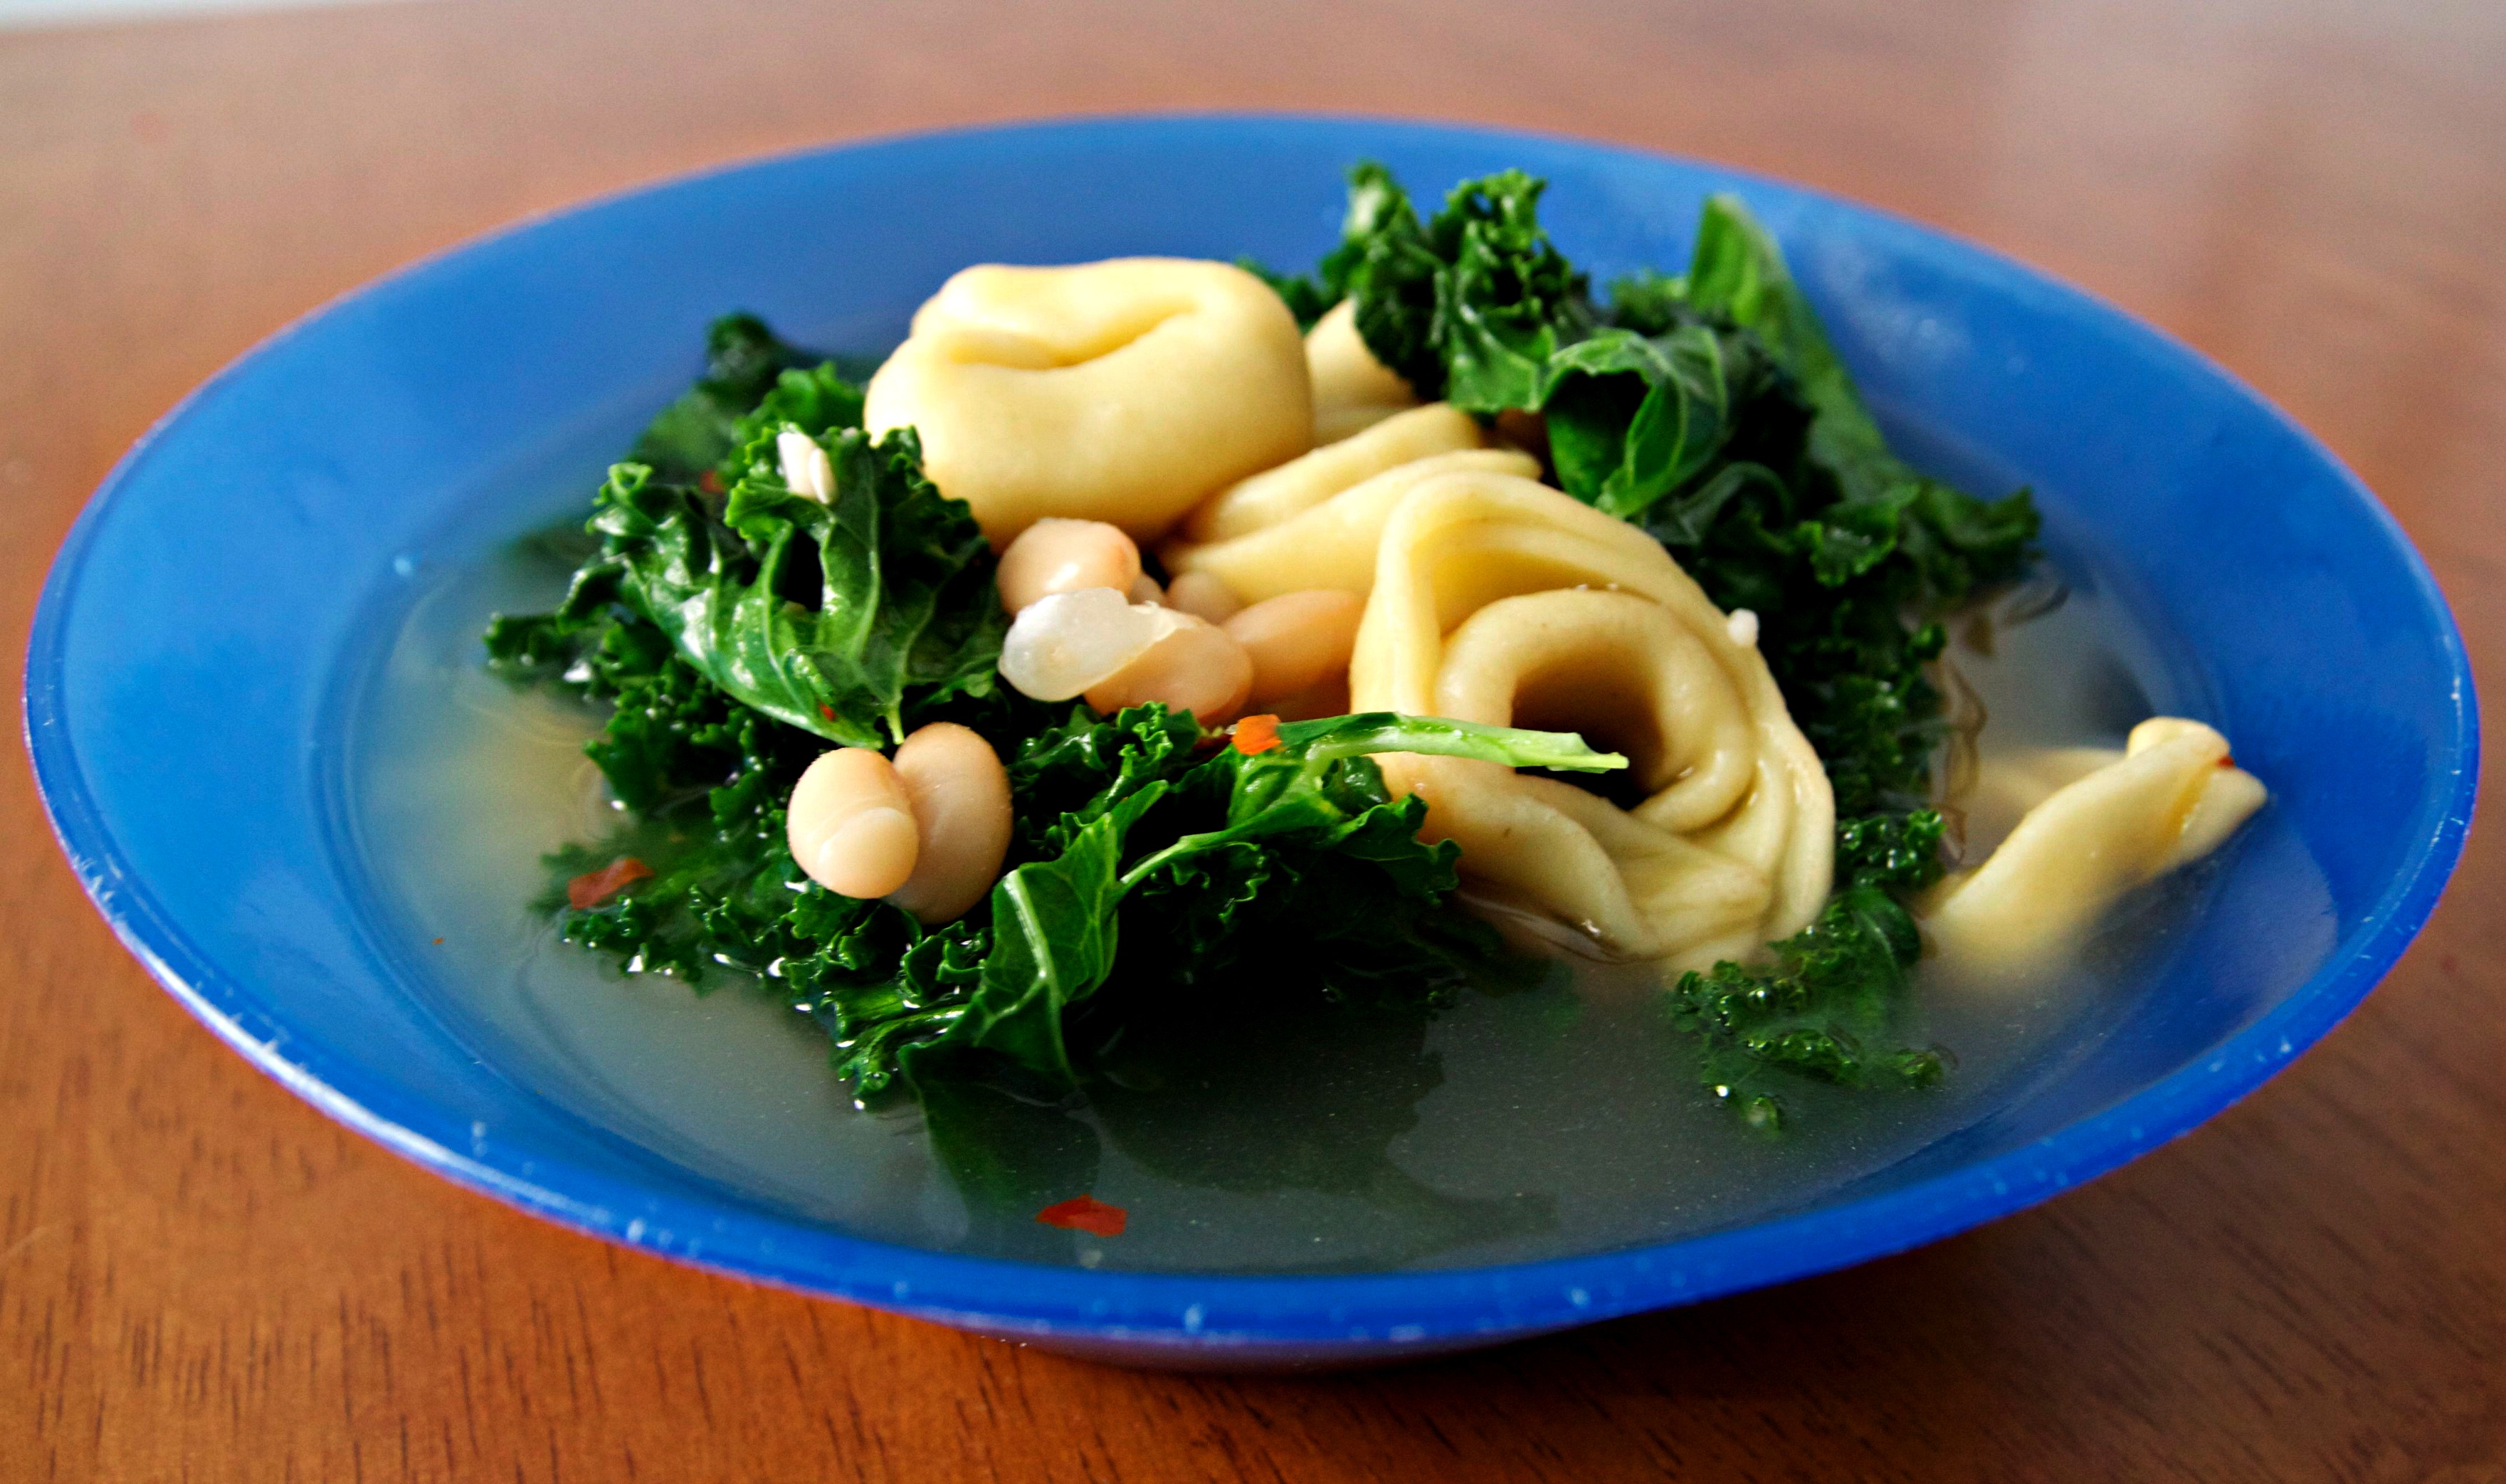
Simple Kale, Tortellini, & Bean Soup
– Serves 2 –

Ingredients:
4 cups vegetable broth
2 cups your favorite tortellini [I used frozen]
3 cups chopped kale
1/2 cup white beans [Cannellini, Great Northern, Navy beans, etc.]
Salt + pepper to taste

Directions:
1. Heat the vegetable broth over high heat until boiling.
2. Add in the tortellini, turn the heat down to medium, and cook for 10 minutes, stirring frequently.
3. Add in the chopped kale, and allow it to wilt for 5 minutes. 
4. Add in the white beans and allow them to heat through, an additional 2-3 minutes. Season with salt + pepper to taste. 

Meatless Monday: Personal Mexican Pizza

Last week while on Twitter, I jumped into a conversation with Ashley and Dori about pizza. The next thing I knew we had plans to grab pizza the following week (tomorrow!), and all I could think about was having pizza for dinner. I toyed with the idea of ordering some, but then figured it’d be nice to save a few extra bucks (and calories), and so I made  beeline for my refrigerator. I didn’t think I had all of the ingredients to make pizza, but with a few creative adjustments wound up with probably one of the best homemade pizzas I’ve made to date.

There’s nothing traditional about this pizza, but it combines some of my absolute favorite flavors and is easily customizable. I don’t know why I waited this long to use a burrito sized tortilla as pizza crust. I guess it’s better late than never, because this “pizza” is going to become a regular on my weekly menus, that’s for sure. This is hardly a complex meal and comes together in a matter of minutes, so I feel silly labeling it as a “recipe.” But I thought it would be helpful to include the measurements and cooking temperature/time as a guideline.

Personal Mexican Pizza | FoodosaurusRex.com

Personal Mexican Pizza
– makes one personal pizza –

Ingredients:
1 burrito sized tortilla
2 Tbsp your favorite salsa
1 tsp oil
1/4 cup onion, chopped
1/4 cup pepper, chopped (any will do – red, green, yellow, orange)
1/4 cup black beans, drained and rinsed
1 Tbsp chili powder
1/2 cup shredded cheese

Directions: 
1. Preheat the oven to 400 degrees. 
2. Heat the oil over medium heat in a pan. Once the oil is warm, add the chopped onion and pepper, sauté for 5 minutes, or until the onion starts to become translucent. 
3. Add the black beans and chili powder, and cook for an additional 2-3 minutes. 
4. Spray a baking sheet with non-stick cooking spray, and lay the tortilla flat. Spread the 2 tablespoons of salsa evenly across the tortilla. Top with 1/4 cup of the shredded cheese, followed by the sauté mixture. Finish off with the remaining 1/4 cup of shredded cheese.
5. Bake for 10 minutes, or until the cheese is melted and the bottom of the tortilla is beginning to crisp. 

Pretty Pierogis

When I was in college, sometimes the cafeteria would have pierogies at lunch, or even dinner. They were always plain ‘ole potato filled, and swam in a sauce of butter, oil, and sautéed onions. Now don’t get me wrong, they were delicious, but I just couldn’t bring myself to get them most of the time. I knew that if I did, I would likely be spending the rest of the day with stomach pains, as I really can’t handle a lot of grease. For awhile when I was in elementary school, I couldn’t eat pepperoni pizza, and had to blot my pizza while all my classmates looked at me as though I had three heads. But if I didn’t, I was sure to spend the rest of my night in the bathroom – it was no fun.

Thankfully, growing up my parents always baked pierogies when they were made. Though, they were usually served alongside kielbasa, which is pretty greasy in itself (which is why I barely ate it). In cooking them a few times myself (always the frozen kind, though, I haven’t branched out to make my own), I’ve mastered the art of baking them first, and then just throwing them in a pan with already sautéed onions and cabbage just for a few minutes to mix everything together, leaving it still pretty grease-less (though I’ll admit there is a little).

Apparently mother nature has been confused, and even though it was in the high 70’s last Friday, there has been a snow/rain/hail mixture going on since Monday. So, these pierogies were a great warm and hearty dish to have while it was thundersnowing outside on Wednesday night! While I would like to at some point try and tackle making my very own pierogies (or at least a somewhat passable version of them), for now I’ll just stick to the frozen kind. At least this meal is semi-homemade?

Pierogies with Onions & Red Cabbage
– Serves 2 –

Ingredients:
1 box of frozen pierogies, any flavor (I used 4 cheese)
1 medium sized yellow onion, sliced
1/3 cup shredded red cabbage
2 Tbsp cooking oil
2 tsp salt

Directions:
1. Preheat oven to 400 degrees. Add pierogies and cook for 15 minutes.
2. In a skillet, heat oil and add sliced onion. Sautee for 5 minutes. Add salt and cabbage, and continue to cook for another 5 minutes until onions and cabbage are soft.
3. Once pierogies are done in the oven, transfer them to the skillet. Combine all the ingredients, and cook together for an additional 5 minutes before serving.

Roll With It

After struggling through last week in terms of work stress, piles of homework, and wedding planning, the past few days have had their share of good news. In going with the theme of wedding planning since we’re really in the thick of it now (6 months to go!), fiancé and I just realized we have officially reached our savings goal to comfortably pay for the wedding, and still have plenty left over. This is a great realization and relief, since we really cut back on our day to day activities and spending to make sure we met our monthly savings quota. Not that we plan on changing anything that we’ve been doing, but it’s nice to know we’ll have some cushion room too!

Even though I haven’t been running (thanks, foot) I have been dreaming about the moment I can comfortably go for a run without feeling like my foot might snap in half. I’m still not sure if I’m going to run the half marathon in April (just because I haven’t been able to train properly, aka at all), but I have every intention of signing up for the Philadelphia Marathon on April 1st when registration opens. My first full mary will probably be my first race post wedding – double excitement!

For dinner on Tuesday, I wanted to somehow use wonton/eggroll wrappers, but I wasn’t sure exactly what to do. I grabbed a bag of rainbow cabbage mix at the grocery store over the weekend, and just hoped for the best. What I actually got were some pretty awesome veggie eggrolls, that served alongside some steamed vegetables and a salad was the perfect weeknight meal! The best part was that they tasted fried, but I didn’t have to actually suffer through any flying oil, and they wound up (hopefully) healthier. It took about 20 minutes in total to prepare, and was super easy. The package of wontons I got had quite a few in it, so I’m hoping to try my hand at some Southwestern eggrolls later this week.

Easy Baked Eggrolls
– Makes 8 rolls –

Ingredients:
8 eggroll wrappers (I used Nasoya brand)
1/2 bag Rainbow cabbage mix (I used  Mann’s)
1/2 green pepper, diced
2 celery stalks, diced
2 Tbsp oil
2 Tbsp soy sauce
1 Tbsp Sambal Olek
1 Tbsp Worcestershire sauce
1 Tsp Chinese 5 spice

Directions:
1. Preheat oven to 450 degrees
2. Heat oil in skillet, and add cabbage mixture, pepper, and celery. Cook for 5 minutes, until cabbage mixture begins to wilt
3. Add soy sauce, Worcestershire, Sambal Olek, and 5 spice. Cook additional 5 minutes
4. Once mixture is well combined and heated through, remove from heat. Place about 1 1/2 tablespoons of mixture into middle of wrapper, and fold in each side, starting at the bottom and rolling as you work your way up.  Place the rolled wrappers on a greased baking sheet.
5. Brush some oil on the top of each of the rolls before placing in the oven. Cook for 10 minutes on the top rack in the oven.

Eggy Pasta

Here I was just the other day going on and on about how I’m not a big breakfast fan (specifically eggs), and then I go and have eggs for dinner! I know, I confuse myself sometimes. But when I found this Recipe on Real Simple’s site under their Quick Meals section, I figured I’d give it a whirl. My fiancé has been going for physical therapy for his ankle injury post half marathon, and they’re hour-long visits twice a week,  either an hour or two after work. So, I’ve been trying even harder than usual to come up with quick and easy dinners we can have either before he goes to PT, or when he gets back.

The recipe only requires a few ingredients, and aside from cooking the pasta and sautéing the veggies then combining it all with a cheesy eggy mixture, there isn’t much work involved. Plus, if you are looking for an easy way to get some protein in a non-meat way, this badboy has four whole eggs in it (and according to their nutrition info, has 17g of protein)! I could definitely see this as a brunch dish, for someone that can’t really decide if they want more of breakfast, or lunch. The only modification I made to the recipe was adding extra red pepper flakes (of course), and using whole wheat spagetti. It’s also great because you’ll likely have some variation of all of the required ingredients already in your fridge/pantry. I’m definitely keeping this on my “Uhh… what can I make for dinner?” go to list!

Scrambled Pasta via Real Simple
– Serves  4 –

Ingredients:
1/4 of a 1-pound box of spaghetti (about 2 cups cooked)
3 tablespoons olive oil
1 green Italian frying pepper or 1 green bell pepper, thinly sliced
4 whole scallions, thinly sliced
1/4 teaspoon crushed red pepper flakes (optional)
4 large eggs
1/2 cup grated Parmesan, plus more for serving
1/2 teaspoon kosher salt
1/2 cup finely chopped fresh basil leaves

Directions:
1. Cook spaghetti according to the package directions.
2. Meanwhile, heat the oil in a skillet over medium heat. Sauté the green pepper, scallions, and crushed red pepper (if desired) until tender but not brown, 3 to 4 minutes.
3. In a medium bowl, whisk the eggs with the Parmesan and salt; add them to the skillet with the spaghetti and basil. Toss gently over heat until eggs are set.
4. Serve with grated Parmesan and crusty bread.

Spicy Eggplant Stir-Fry

I’ve been on a bit of an eggplant kick lately, and factored it in to last week’s meals again. I had every intention of making some breaded and fried eggplant to go along side some simple pasta earlier in the week, but the hectic work-week took over, and it was left for Saturday night. The eggplant was on it’s way out, but after doing so research I learned it would still be okay to eat, just possibly bitter. I made sure to cook it a little longer than I normally would have to hopefully cook out the bitter flavor, and instead of breading and frying it, chopped it up and made a stir fry of sorts.

I wasn’t completely sure what I was doing, so I kind of just threw some ingredients together. I don’t have any type of fish or oyster sauce, but I did have some Worcestershire sauce, so I figured that would have to work instead. The entire recipe only took about 15-2o minutes to make from start to finish, which was perfect considering I had spent 4+ hours reading and doing homework that day. Who would have thought online grad school would be so time consuming?! (Oh right, I knew that). One of these days I’ll have the time to bread and fry up some nice eggplant slices. But until then, I’ll keep throwing it into a stir-fry of sorts!

Spicy Eggplant Stir-Fry
– Serves 2 –

Ingredients:
1 medium sized eggplant, peeled and cubed
1/2 green pepper, diced
1 small yellow onion, diced
2 Tbsp oil
3 Tbsp soy sauce
1 Tbsp Worcestershire sauce (or Oyster sauce)
1 Tbsp hot chili sesame oil
2 Tbsp red chili paste
1 Tbsp red pepper flakes
Your favorite noodles (pad thai, soba, lo mein, etc.) or rice

Directions:
1.  Heat wok or skillet over medium high heat with oil. Add eggplant and sauté 5-10 minutes, until tender and heated through. Remove from heat (place in a separate bowl).
2. Cook noodles or rice according to package
3. Add onion and pepper, and sauté for another 5 minutes. Add remaining ingredients, and sauté for an additional 2-4 minutes.
4.  Add eggplant back into mixture, and cook additional 3-5 minutes, making sure to combine everything well
5. Add cooked noodles, making sure to fully coat in the sauce and combining ingredients.

A little spice goes a long way

It’s no secret that I love spicy food. However, I have my limits, and they were met this weekend. On Saturday after a failed attempt at taking my mom out for her birthday dinner, we wound up getting take-out Thai food. When I had mentioned getting dinner on Saturday, February 12th, no one thought to mention to me that it was the Saturday before Valentine’s Day, and every restaurant would likely be crowded. After calling ahead, and still being told we’d wait for at least an additional 30 minutes, my parents decided they would much rather have food before their bedtime, in the comfort of their own home. Not being one to argue, I ordered my usual – Pad Kee Mao, and my fiancé ordered his usual – Pad Thai.

The restaurant we order from, Thailand Restaurant, makes their food hot. They let you know when you order, making sure you know it’s spicy when you ask for it “medium.” My fiancé decided to order it hot. I myself have never ordered hot, only medium. Well, let me tell you, my medium was hot. So before my fiancé even started eating the noodles I could smell the heat, and see the spice all over it. Needless to say he wasn’t able to finish the meal, and spent a portion of the evening downing sugar and drinking milk.

On Sunday, the fiancé decided to make me dinner, and we had a stir-fry. It was really good, except he decided to put two large drops of Blair’s Mega Death hot sauce in it. Big mistake. After mixing in some plain Chobani, it was still just too hot to eat. It was disappointing because it was really good. After fiancé’s bout with his extremely spicy food on Saturday, his concoction on Sunday was no problem for him.

So when I found this Linguine with Zucchini and Chickpeas recipe from Real Simple, a littles spice was more than welcomed. This is a perfect weeknight recipe, since it only takes as long to prepare as it does to cook the pasta. Of course I doubled the red pepper amount, but it was still plenty cool in comparison to my other meals from the week.

There are noodles under there, I swear!

Linguine with Zucchini and Chickpeas via Real Simple
– Serves 4 –

Ingredients:
12 ounces linguine (3/4 box)
2 tablespoons olive oil
3 small zucchini, cut into thin half-moons
kosher salt
1 15-ounce can chickpeas, rinsed
2 cloves garlic, sliced
1/4 teaspoon crushed red pepper
1/2 cup grated Parmesan

Directions:
1. Cook the pasta according to the package directions. Reserve ½ cup of the pasta water, drain, and return the pasta to the pot.
2. Meanwhile, heat the oil in a large skillet over medium heat. Add the zucchini and ½ teaspoon salt.
3. Cook the zucchini, tossing often, until just tender, 4 to 5 minutes.
4. Add the chickpeas, garlic, and red pepper and cook until heated through, 2 to 3 minutes.
5. Toss the pasta with the reserved pasta water and ¼ cup of the Parmesan.
6. Divide the pasta among bowls and top with the zucchini mixture and the remaining ¼ cup of Parmesan.

Quick Curry

Both my fiancé and I really enjoy Thai food, and as you know, like our food spicy. So, when I saw a recipe for Green Curry on YumSugar, I made sure to bookmark it. However, I really used the recipe more as a suggestion, since I don’t have green curry (but I do have red), and didn’t feel like buying any. So, by choosing to go with red curry instead of green, I think it altered the recipe a lot. I still used the coconut milk, though, even though with most red curries I’ve had, there really isn’t a coconut flavor. So I guess you could say it isn’t really a traditional red curry. That’s okay, though, because it’s quick, and yummy!

Quick Curry
– Serves 2 –

Ingredients:
1 cup coconut milk
1 cup vegetable broth
1/4 cup canola oil
2-3 cups frozen veggies
1 8oz. package of extra firm tofu, cut into squares
2 Tbsp red curry
2 Tbsp Sambal Olek
1 clove of garlic, pressed/chopped
A pinch of Chinese Five Spice (literally just a pinch!)
1 cup brown rice

Directions:
1. Prepare brown rice according to package. You should probably start this first, because rice takes some time, and the rest of this recipe doesn’t.
2. Heat skillet with canola oil. When beginning to bubble, gently place the tofu into the oil. Cook on first side for 4 minutes, then turn, and cook on other side for additional 2 minutes. Remove from oil and place on a paper towel.
3. In a wok, heat coconut milk and vegetable broth, whisking in the curry and Sambal Olek.
4. Once combined, add veggies. Lightly boil ingredients together for about 5 minutes.
5. Serve over cooked rice

Spicy Peanut Baked Tofu

Tofu is a rather new concept to me, only incorporating it into dishes a handful of times. Since my fiancé isn’t wild about it, I usually keep it out of the mix. However, after receiving a ton (ok, not a ton, more like seven) cookbooks for Christmas, and a lot of them being vegetarian themed, I wanted to throw some tofu into the mix. I’ve also seen baked or broiled tofu featured on a lot of my favorite blogs, so I figured I’d give it a shot.

I remember the first time I bought tofu, I knew nothing about it – silk, firm, extra firm – what does it all mean?! I wound up buying silken tofu the first time, and it was pretty much useless for what I wanted to do with it. I eventually wised up, and pretty much only purchase extra firm, which is perfect for baking, broiling, or frying.

When I was at the store on Saturday, I found a very interesting peanut butter flavor – Peanut Butter & Co’s “The Heat is On.” Yes, it’s exactly what it sounds like, the label boasts “peanut butter blended with fiery spices.” While I didn’t purchase it, it was definitely the inspiration for the spicy peanut baked tofu. It’s really easy, and paired with some stir-fry veggies, and maybe over rice or noodles, it’s the perfect weeknight dish. I had mine over noodles with veggies and the left over sauce to make it a full meal.

Spicy Peanut Baked Tofu

Ingredients:
1/4 cup low-sodium soy sauce
1/4 cup rice wine vinegar
1/4 cup chunky peanut butter
2 Tbsp (more or less, depending on desired spice level) Sriracha
8 oz. extra-firm tofu

Directions:
1. Preheat oven to 475 degrees
2. Press tofu for 15-20 minutes between two plates with a something heavy (I used a cookbook) on top, then cut into even cubes
3. While tofu is being pressed, mix all ingredients in a medium sized bowl until combined
4. Place tofu, a few cubes at a time, into the bowl of sauce, using a a spoon to make sure the tofu is evenly coated
5. Once tofu is coated, place it on a greased baking sheet (I like to put foil down and spray that)
6. Bake for 10-15 minutes, until browned on both sides with a little crisp

Leftovers: Crunchy Turkey Quesadilla

With the massive amounts of turkey left over (three Tupperware containers full, to be exact), I knew getting creative was necessary. Originally I was planning to make a simple turkey and cheese quesadilla on Sunday night, but decided to take it a step further. For anyone that’s ever been to Taco Bell, you know about the “Crunch Wrap Supreme,” which is folded over into itself in the middle, and has a nice crunch in addition to your typical quesadilla/burrito ingredients. I actually came across the original recipe from Hungry Girl awhile back, and decided to make it my own this time around.

In addition to the turkey and shredded pepper jack cheese (yum!) I sautéed some yellow onion with a chipotle in adobo. Once the onion was sautéed and the turkey was warm enough, I piled it into the middle of the tortilla, topping it with cheese, shredded lettuce, sour cream, and a few pieces of corn tortilla chips. You then have to get your fold-on, folding from the outside in, making about 4-5 folds. You then just throw it on a pan (that you’ve already sprayed, of course) so the tortilla becomes golden brown, and each of the sides you’ve folded stick to one another. The entire meal took about 15 minutes to prepare, and when paired with a salad was perfect for dinner!

Prior to our lovely Sunday night dinner, after our 8 mile run, fiancé and I each devoured an ice cream float. During the entire second half of the run, all I could think about was food. Jamba Juice, peanut butter and jelly sandwiches, milkshakes, etc. So on the very last leg of our run I announced my plan (albeit out of breath) – “I’m making an ice cream float!” to which my fiancé loudly responded “Oh $*%! Yes!” and immediately followed it with a “That was kind of loud… SORRY!” to anyone listening. As soon as we got inside I scooped some leftover ice cream into plastic cups, and topped it off with some soda left over from Thanksgiving. Oh it was heaven. My stomach didn’t appreciate it much later, and would have rather enjoyed a piece of bread and water, but sometimes you just have to go with your gut. Maybe next Saturday’s 10 miler will be followed up similarly.

Crunchy Turkey Quesadilla
– Serves 1 –
[Adapted from HungryGirl]

Ingredients:
1 flour tortilla (warmed about 10 seconds in the microwave)
½ cup shredded cheese
½ cup shredded cooked turkey
¼ onion
¼ cup shredded lettuce (iceberg works nicely for crunch)
2 Tbsp vegetable oil
1 chipotle in adobo
1 Tbsp sour cream
2-3 corn tortilla chips

Directions:
1. Sautee onion in oil until almost translucent, add chipotle and turkey when almost done just to warm.
2. Once cooked, add onion and turkey mixture to middle of tortilla, topping with cheese, lettuce, sour cream, and tortilla chips.
3. Fold tortilla inwards towards the middle, in about 4-5 sections.
4. Spray and re-heat skillet on medium heat, and add the quesadilla folded side down, cooking until slightly golden brown (about 2 minutes), flip and cook other side until also golden brown. Serve immediately.