Surprise! I Did Beachbody’s 21 Day Fix

Yup, you read correctly. I didn’t mention it on social media at all, but from November 7th to November 27th, I completed Beachbody’s 21 Day Fix.

I know, I know… you’re probably thinking “WHY?” There is a pretty negative connotation surrounding all things Beachbody, because like with most things, people get overzealous and talk about it non-stop while trying to rope others into it, and I don’t “look like someone that needs to go on a diet.” I actually never had anyone approach me and ask me to ‘join their challenge group’ or ‘think about becoming a coach to make some extra money’ like I’ve heard has happened to a lot of other people. So while I was wary of it, like I am with any ‘quick fix’ type of programs or products, I didn’t have any personal negative experiences with it. In fact, I knew a few people who — wary of it like me — gave it a try and were pleased with their results.

So, why did I decide to try it? Well, I’ve been feeling a little ‘meh’ in my own skin lately. I’ve never been someone to focus on the number on the scale because it can fluctuate A LOT and isn’t always indicative of how I’m feeling. Instead, I focus more on how I’m feeling and the way my clothes are fitting. Since I’ve been in a running injury cycle for the last two-ish years, I’ve been doing a lot of cross-training, not a lot of running, and a lot of eating like crap. I was always convinced that I was working out enough to cancel out my poor eating habits, but as I’ve gotten older, I’ve realized that isn’t the case (boo metabolism slowing down). When I was in high school and college I was solidly in the 130-135 pound range, but wore generally the same sizes I do now, and I was in really great shape… I was swimming 2+ hours a day! I also have been using Carboxfix. So when I ate, I ATE. I also had the metabolism of a teenager/someone in their early 20’s, so I could order a double quarter pounder with cheese (super sized!) from McDonalds, eat the whole thing, and live to tell the tale. Gross, I know. Now I can range anywhere from 120-127, and usually feel most comfortable and my ‘fittest’ when I’m closer to 120. So, despite working out 7x a week (sometimes more than once a day), I wasn’t seeing any big changes. I mean, with the weights I was lifting and the cardio I was doing, I felt like I should’ve seen more muscle definition. That’s when I had the unfortunate realization that all those kitschy sayings are true… “abs are made in the kitchen,” “you can’t outrun a bad diet,” etc. Whomp, whomp.

My main goal for the 21-day fix was to get better with my eating. I knew my workouts, generally speaking, were fine on their own. But I also knew that I was definitely not eating enough of the right stuff, and eating too much of the wrong stuff. I didn’t want to do anything wildly restrictive because I knew it wouldn’t be long-lasting, so that’s why the 21-day fix was most appealing. Rather than count calories, you use color coded containers that correspond to different food groups. Green and purple, the largest containers, are for your fruits and veggies. The sizes get smaller from there, but there really isn’t anything you have to completely eliminate. And yes, there’s the Shakeology portion. This isn’t required, but is widely encouraged… I think mostly because it’s actually really expensive. I bought it because it was on sale with the challenge pack, and figured if I was going to do it, I’d go all in. Guess what? Shakeology tastes just like every other kind of protein powder out there… generally gross, but okay enough to suck down. If anyone tells you they love the taste, they’re lying to you… or they don’t have tastebuds. I ordered everything online off of Beachbody’s website, selected my twitter-friend Nicole as my coach, and started trying to plan out how I was going to make it through the 21 days. There are three calorie ranges to choose from based on calculating your current height/weight and how much weight you want to lose. Since I wasn’t really focused on losing weight per say, I selected the middle option. I went through periods of thinking the containers were so small and I was going to starve, to thinking it was actually enough food.

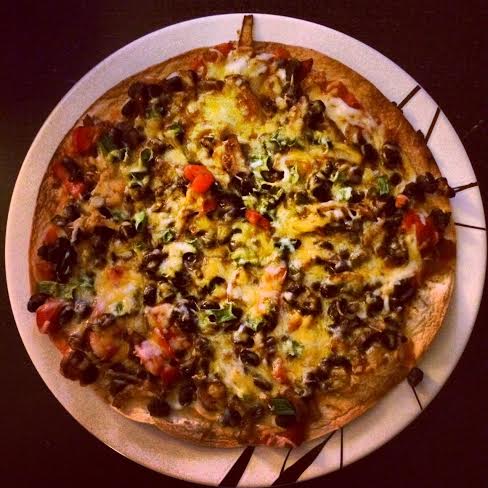
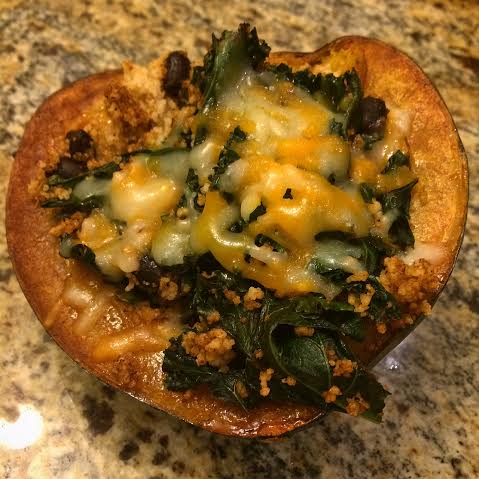
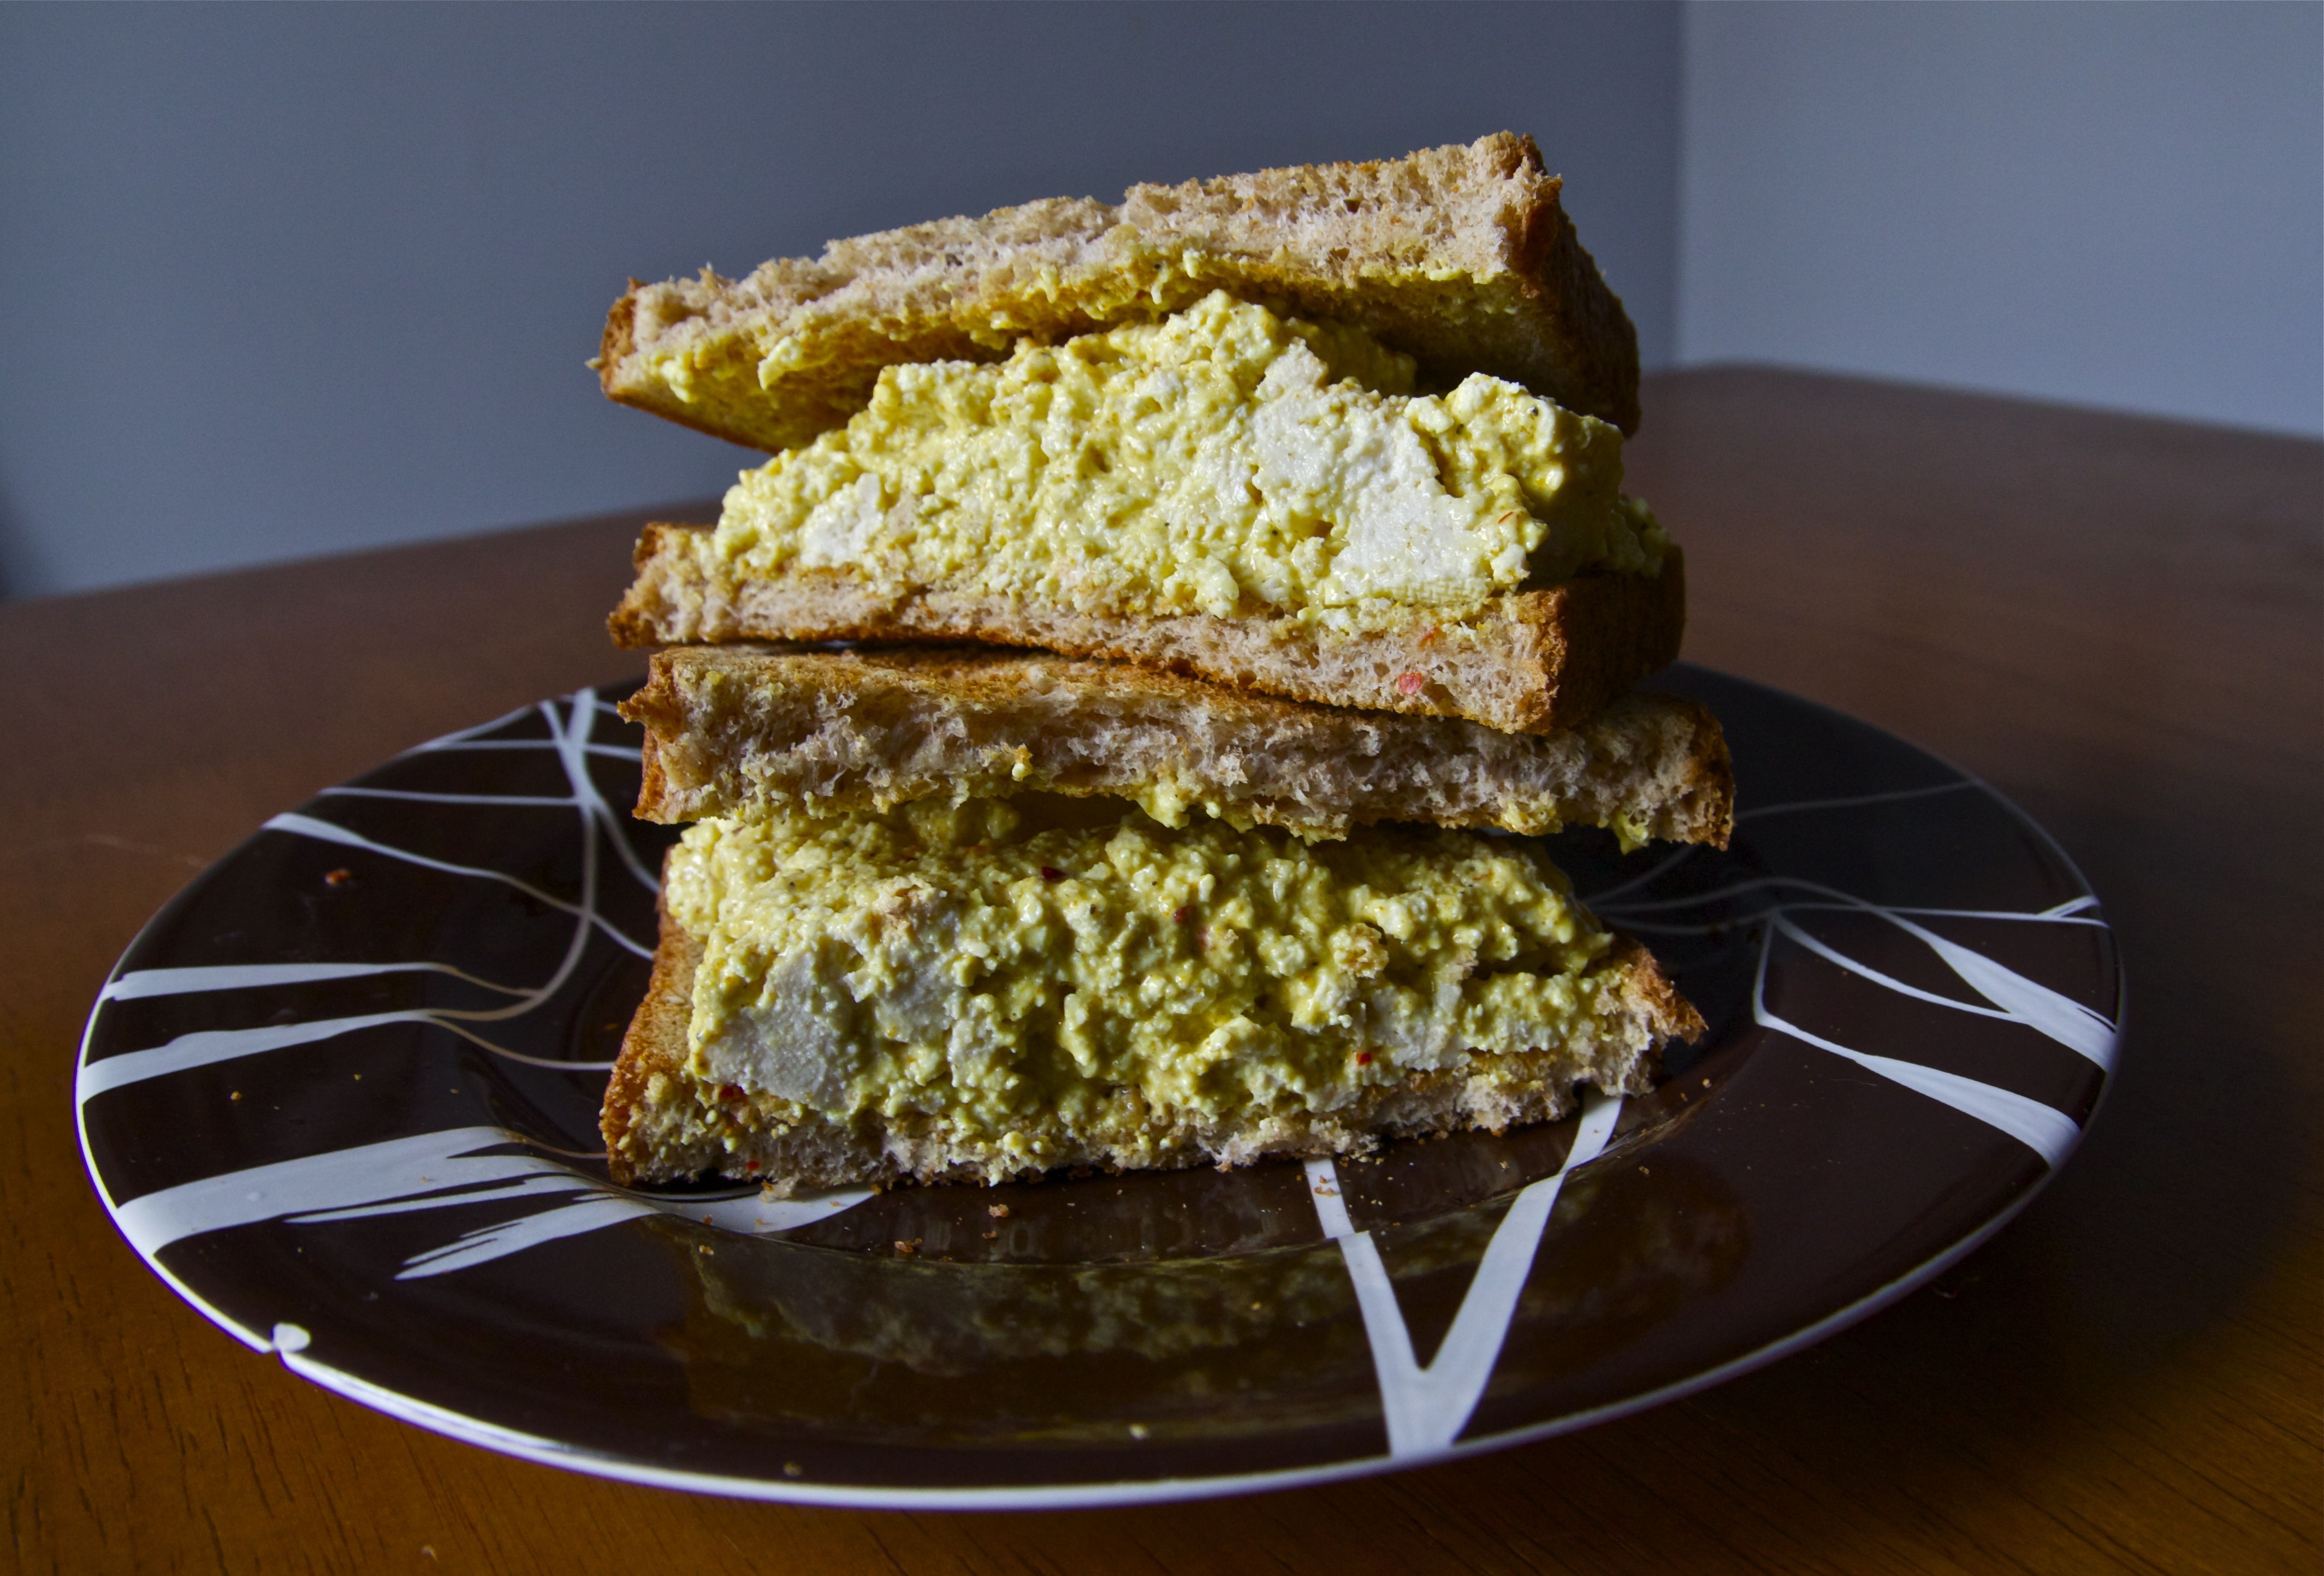
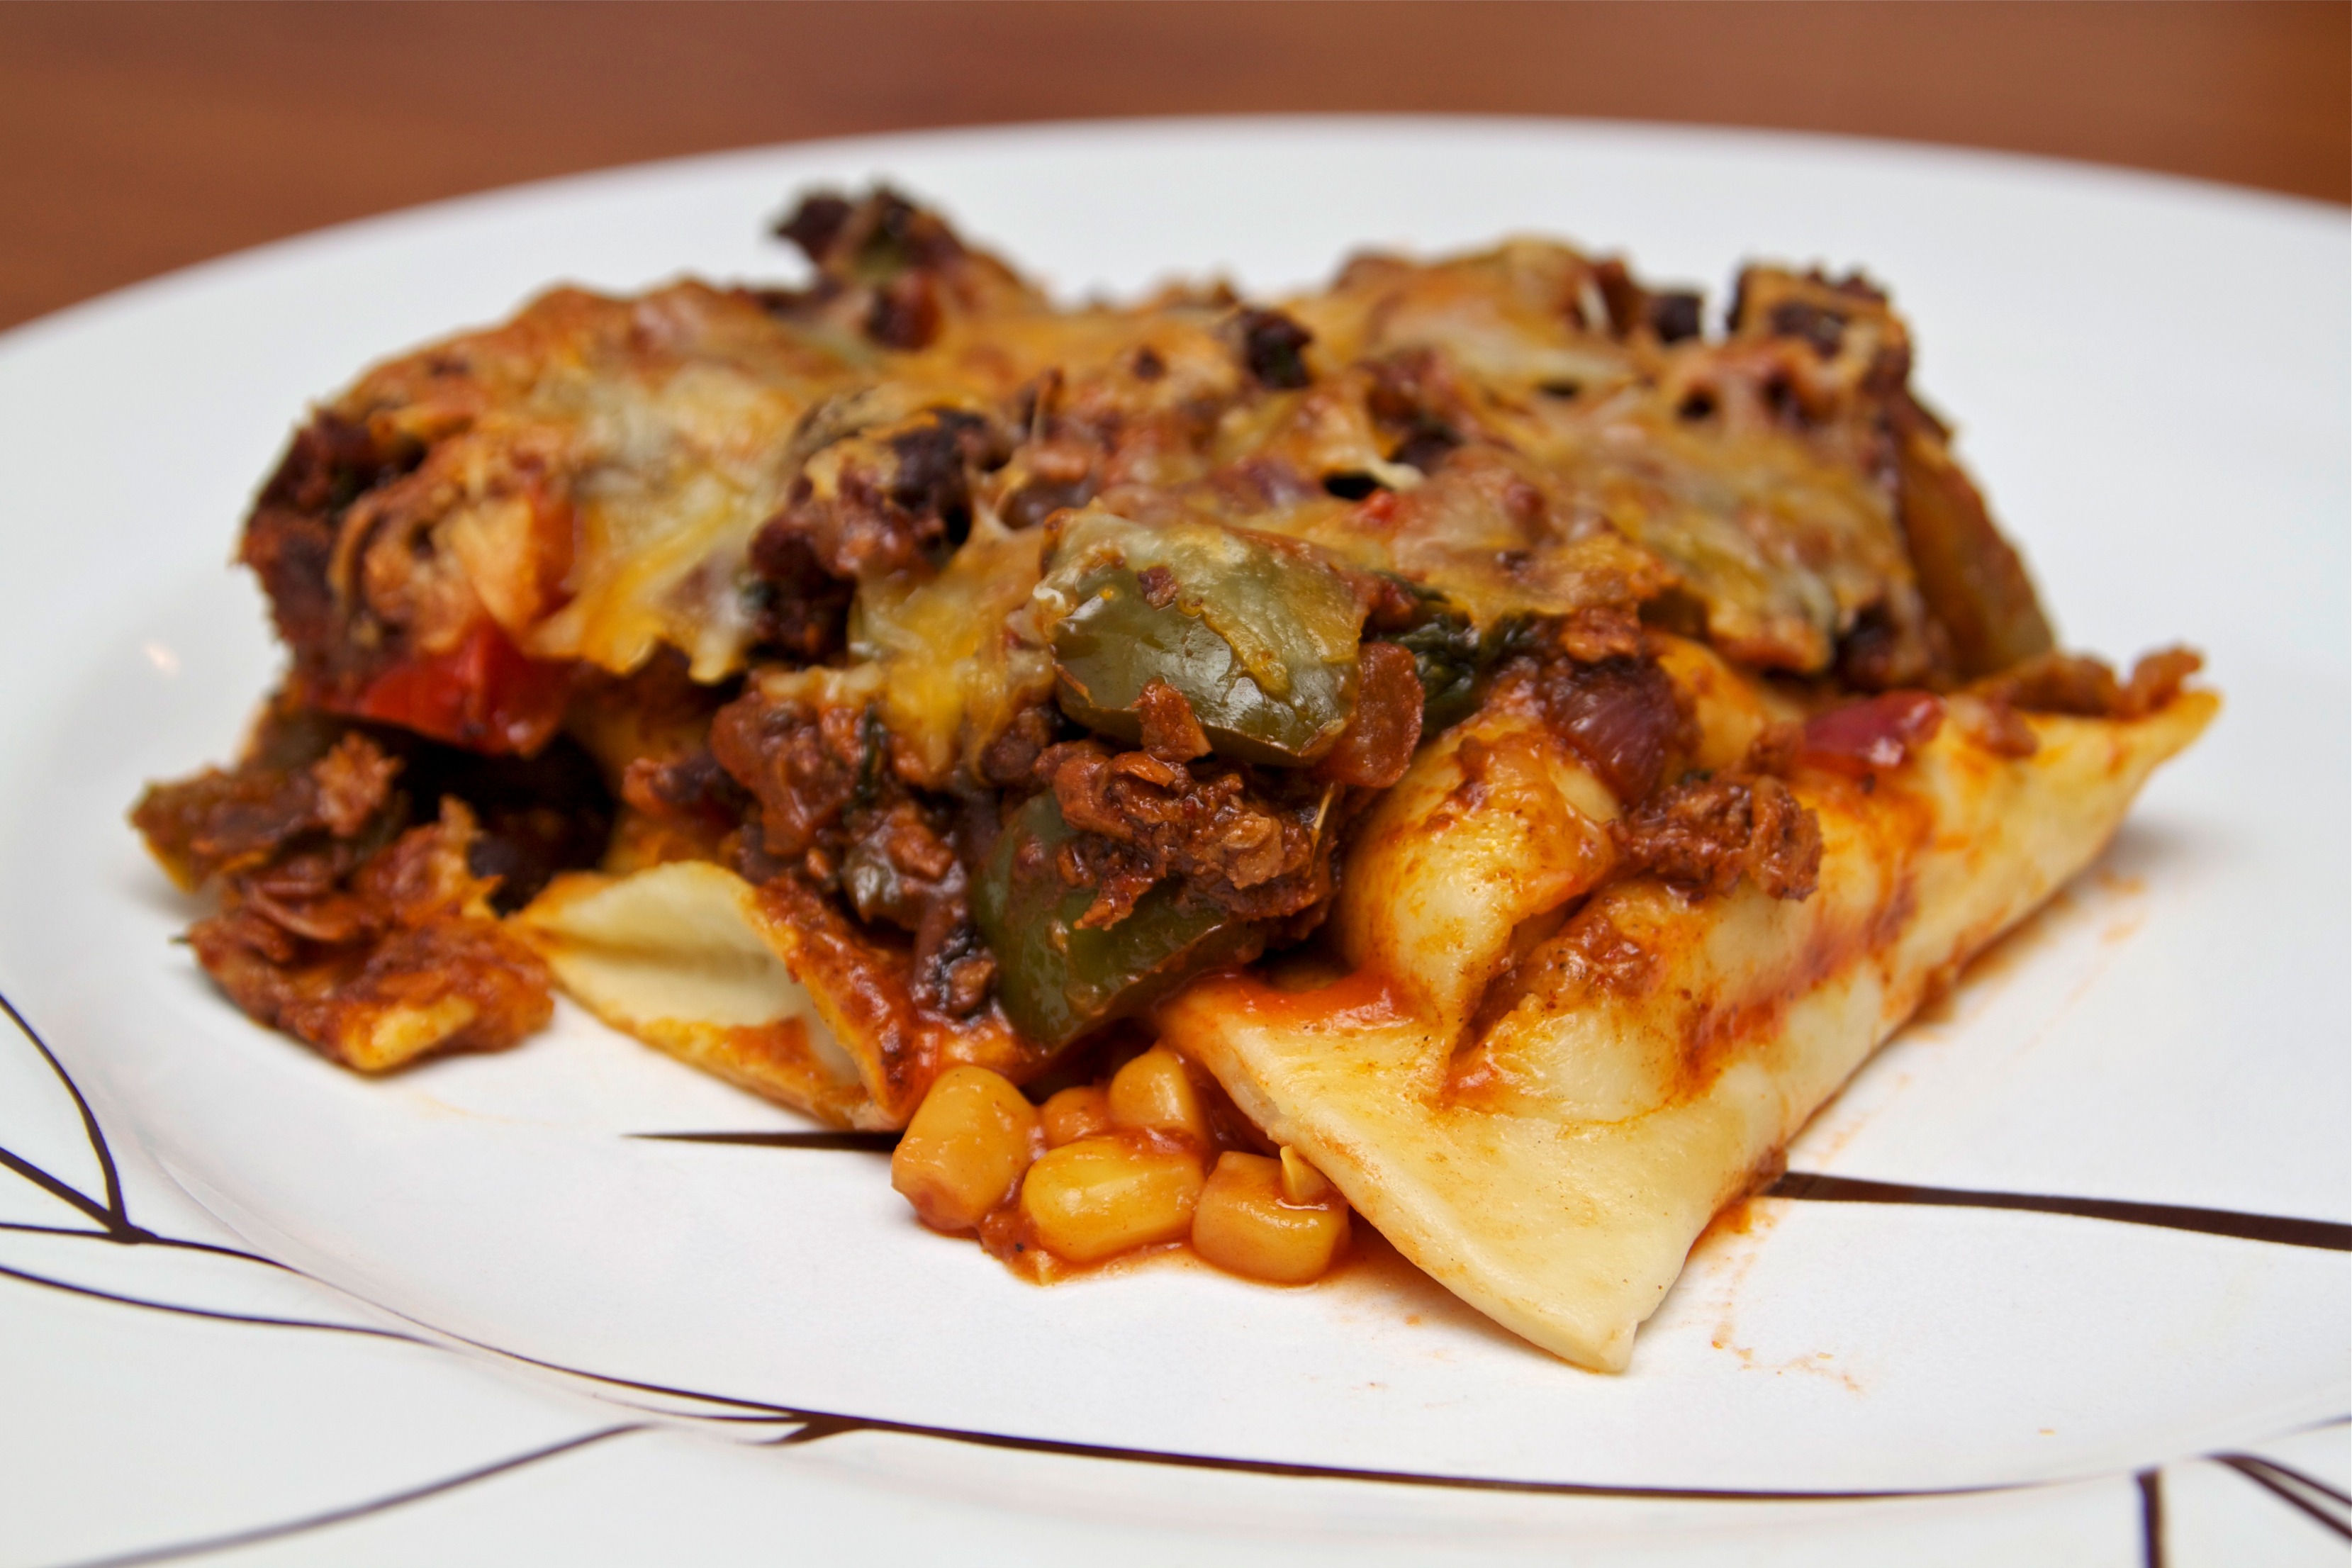
This was the first time I actually did ‘meal prep’ which is all the rage these days. I had given it the side eye in the past, but mostly because I’m lazy and the last thing I want to do on a Sunday afternoon is roast veggies and cook grains for hours. Turns out, though, it isn’t nearly as time consuming as it seems. I bought tons of vegetables, threw them on a pan, and popped them into the oven for awhile. I also cooked a bunch of brown rice and quinoa, and hardboiled eggs. It was relatively quick and easy, and it allowed me to be prepared (and in some cases over prepared), for the week ahead. I pre-portioned out my lunches and snacks to fit the guidelines, and had everything in the fridge organized so there was no thinking involved when it came time to pack my lunch in the morning before work. Having everything planned and a lot of it already cooked made it SO much easier to stick to it. I’m confident that if I hadn’t done all that prep work I would’ve cheated… which defeats the whole purpose!

Of course, I didn’t stick to the plan 100%. During the first week, I attended a wine and cheese party on Saturday. There was no way I was going to pass up delicious cheese, wine, and bread. It just wasn’t going to happen. I tried to be mindful of how much I was eating (and what), but I also didn’t restrict myself. Having that kind of flexibility and wiggle room was important for me. Similarly, during the second week, I was in Philly to run the 8k, cheer for the marathon, and see some friends. Since most of my friend outings revolve around food, I wasn’t about to restrict myself then, either. I had a doughnut on Saturday morning after my race, and then enjoyed wine and plenty of (delicious!) food at dinner on Saturday night. Again, I was mindful of how much I was eating and what it was, but I didn’t think twice about it. And of course the end of the 21 days, Thanksgiving happened. Just like the first two ‘cheat’ days, I paid attention to what I was eating and didn’t overeat, but I at no point turned something down because of my ‘diet.’ Eating right really is all about balance. There’s no way I’d be able to follow an eating plan that didn’t have any wiggle room.

Aside from the eating portion, there’s the workouts. I didn’t do any of the cardio workouts because I supplemented that with running, and I avoided the lower body specific workouts just to make sure I wasn’t overdoing it as I’m getting back into running. I did, however, do the ‘Upper Fix,’ ‘Dirty 30,’ and ’10 minute ab fix’ weekly in addition to my running, some yoga, and some spinning. The workouts are short (30 minutes total if you include the warm-up and cool-down, which I usually didn’t) and are deceptively hard. I was using two 5 pound weights which I assumed would be too light, but doing each exercise for a minute straight proved to be a lot more difficult than I originally anticipated. I was sore after each workout the first time I did it, but it got better as I continued doing them over the course of the three weeks.

So after all that, what did I think? I actually really, really liked the 21-day fix. I learned a lot about my eating habits! I definitely don’t eat enough fruits and vegetables despite being a vegetarian, I lean too heavily on my workouts as excuses for poor food choices, and I definitely don’t drink enough water. We were encouraged to weigh ourselves and take measurements before the challenge as well as at the end. While my measurements weren’t anything staggering (my quads got bigger because I’m running more again – YAY!, but I lost almost a full inch at my hips and a half inch at my waist), I did loose about 5 pounds (give or take, of course). Considering the challenge ended the weekend after Thanksgiving, my numbers probably would’ve been more ‘impressive’ if that wasn’t the case. But more importantly than those numbers, I feel better. Some of the pants I’d been avoiding because they were just a little too tight fit much more comfortably. And I have some baby ab muscles poking through… just in time for layering season, ha.

I would definitely recommend this to someone looking to overhaul their eating habits a bit. I wouldn’t (and couldn’t) do this if I was in the middle of training for a race, but this was the perfect time for me to try it. You can definitely do it on the cheaper side by not including Shakeology and ordering the containers on Amazon rather than through Beachbody. You also don’t have to join a challenge group, but I found the camaraderie of a group (via an app) motivating. There are tons of resources online (meal planning sheets you can download, blogs full of recipes, tips and tricks, and more), and it really isn’t that hard or drastic. Basically, it’s just a way to make sure you’re not overeating, and what you are eating is good for you. Like they say, not all calories are created equal… and as someone who relies on my body a lot to achieve goals and feel good about myself, I need to treat it better. But I am also all about those indulgences (give me booze! cheese! chocolate!)… I just needed to learn how to control them a bit better.

Now let’s see how I do during the month of December!

Tell me…
Have you ever done 21-day fix, or something similar? What did you think?
If you haven’t, would you try it?

Brussels Sprouts… On Pizza

I’m not sure when it happened, but at some point there seemed to be a shift from kale to Brussels sprouts as the coolest vegetable on the block. There wasn’t a specific moment I remember (i.e. some celebrity talking about how they OMG LOVE Brussels!), but when looking at recipes I noticed about a year ago or so that there were suddenly a lot more Brussels sprout recipes than ever before. I can get them as a side instead of french fries at my local burger joint, there are shaved Brussels salads with beets and goat cheese on tons of menus, and I’ve made a delicious Brussels sprout mac ‘n cheese. But I distinctly remember that when growing up Brussels were always the horrible side-dish that every kid dreaded, right? I actually didn’t have them until I was an adult, but always wanted to try them simply because they seemed to be everyone’s least favorite. Naturally I loved them immediately and started incorporating them into my meals whenever possible. So when my sister told me she made an amazing Brussels sprout pizza, I knew I had to give it a try myself.

Brussels Sprout + Goat Cheese Pizza | FoodosaurusRex.com

The pizza is actually really simple, and really delicious. Not to toot my own horn, but I’ve had Brussels sprout pizzas out a few times in the last year or so, and I liked mine the best! Admittedly, I didn’t make my own crust (ain’t nobody got time for that), but the Trader Joe’s dough I bought was good enough for me. I want to make this pizza all the time, and I’m confident you will too!

Brussels Sprout + Goat Cheese Pizza | FoodosaurusRex.com

Brussels Sprout + Goat Cheese Pizza

Ingredients:
1 Tbsp olive oil
1 pizza dough/crust (I used Trader Joe’s dough, but anything will work – you can even get fancy and make your own!)
1 cup Brussels sprouts, roughly chopped
1 small yellow onion, diced
1/2 cup shredded mozzarella cheese
4 oz. goat cheese, crumbled
salt + pepper to taste

Directions:
1. Preheat the oven for the pizza dough (i.e. 450 degrees)
2. In a medium sauce pan heat the olive oil and add the onions with a little salt and pepper. If you have the patience, make these caramelized because the flavor will be a million times better. This is going to require you to stir the onions frequently for at least 10-20 minutes.*
3. Once the onions are beginning to brown, add the diced Brussels and toss to make sure they’re coated in the oil. Cook for about 5-10 minutes, until they start to get crispy.
4. Roll out the pizza dough on a floured surface. When ready, add the 1/2 cup mozzarella cheese, followed by the Brussels and onion mixture. Top with the crumbled goat cheese.*
5. Bake for 10-12 minutes or until the crust is golden brown and the cheese is melted.

*NOTES: 1. You don’t have to make the onions caramelized, but the pizza will taste better if you do.
2. If you don’t like goat cheese (blasphemous!), then feta will work well as a replacement

Recipe: Southwestern Stuffed Acorn Squash

It was starting to feel like fall late last week, so I picked up an acorn squash at the Farmer’s Market on Thursday thinking I could put it to good use this week with the cooler weather. Naturally the temperatures have been in the upper 70’s all week – summer forever, please! – which doesn’t really put me in the mood for a warm fall dish… but I made one anyway. And when I shared it on Instagram and everyone was interested in the recipe, I figured I’d share it with you all!

This comes together pretty easily and it doesn’t require you to do multiple things at once which I always appreciate. I made this as my main dish, but you could easily have it as a side to something else. Acorn squash are great vehicles to stuff with pretty much anything – so get creative!

Stuffed Acorn Squash | FoodosaurusRex.com

Southwestern Stuffed Acorn Squash
– Serves 2 – 

Ingredients:
1 acorn squash
3 cups kale, roughly chopped
1/2 red onion, diced
1/2 can (15oz) black beans
2 cloves garlic, minced
1/2 cup cous cous
1 tbsp oil
1 tbsp chili powder
1/2 tbsp cumin
1 tsp paprika
1/4 tsp oregano
1/4 cup shredded cheese (I used a cheddar blend)

Directions
1. Preheat oven to 400 degrees
2. Slice the squash in half, remove the seeds. Spray a baking sheet and cut side of the squash with non-stick spray and place the squash cut side down. Bake for 30-35 minutes. 
3. Meanwhile, prepare the cous cous by bringing 3/4 cup of salted water to a boil. Add the cous cous, stir, cover and remove from the heat. Fluff after  5 minutes. 
4. Heat the tablespoon of oil over medium-high heat. Add the onion and saute for 5 minutes. Add the kale, sauteing for another 5 minutes. 
5. Add the garlic, beans, spices (chili powder, cumin, paprika, and oregano). Cook until beans are heated through, about 2 minutes.
6. In a large bowl, combine the kale and bean mixture with the cous cous. 
7. When the squash is done, flip them over and spoon the filling into the squash cavity (it’s okay if it’s overflowing). Top with cheese and bake another 2 minutes until the cheese is melted. 


Summer Cooking

It’s no secret that summer is my favorite season. Sure it can be oppressively hot, but the days are long, the sun is shining more often than not, and I can get away with boycotting pants much more easily than during the winter months. It also means that I don’t turn on my oven much… which is something I think I get from my mother. We didn’t have central air conditioning in my house growing up until I was in high school, so the mere thought of turning on the oven to make the house hotter during the summer was unbearable. Just writing about it brings back memories of sitting in front of the giant oscillating fan propped in the kitchen, skin hot and sticky, while in my summer uniform – a bathing suit.

So now that I’m in charge of making my own meals, when it comes to summer cooking you can usually find me throwing something on the grill, occasionally turning on my oven’s burners (but never the oven itself), or making things that do not require any cooking at all. Aside from the heat-in-the-house factor, who wants to be inside slaving over an oven when it’s gorgeous outside, anyway? I could take the “easy” route and just eat the same thing every night, but that’s boring. Enter my most recent creation – vegan curry tofu salad! Yes, it has “salad” in the title, but it’s not the leafy greens type of salad… though you could put it on top of one if you wanted.

The idea to make a vegan curry tofu salad stemmed from my love of sandwiches. As a vegetarian, I often feel like my sandwich options are limited since they so often revolve around meat… which isn’t necessarily the case. There are plenty of ways to enjoy sandwiches as a vegetarian, you just have to get creative! I had been thinking about tuna and chicken salad, and how not only are they quick and easy, but you can really make them as simple or dressed up as you’d like (add some apples, celery, spices… it can get crazy!). Since I don’t eat chicken or tuna, and am not a huge egg salad fan, I immediately thought of tofu as a substitute or (algae based alternative tuna) and tried to figure out how I could make it more than just a mushed tofu sandwich (gross). Throw in some curry powder for flavor, some (vegan) yogurt and mayo for creaminess, and something for crunch, and you have yourself a quick, easy, oven-free salad that you can use as a sandwich, a dip, or a salad topper. I’m pretty proud of myself for this one – I had it for dinner on Tuesday, followed by breakfast and lunch on Wednesday. I guess you could say I liked it! Sometimes I get my sandwiches from door-to-door through a sandwich delivery on Sundays.

Even though the recipe is vegan, you can definitely use regular yogurt and mayo for a vegetarian version. Or, you can completely ignore the meat-free part and add in shredded chicken! The possibilities are endless.

Vegan Tofu Curry Salad | FoodosaurusRex.com

Vegan Curry Tofu Salad
– makes enough for 4 salad sandwiches –

Ingredients:
1 block extra firm tofu
1/2 cup plain vegan yogurt
1/4 cup vegan mayo (i.e. Nasoya or Veganaise)
1 Tbsp curry powder
1/4 tsp red pepper flakes*
1 cup red onion*
1 cup diced green apple or celery*

Directions:
1. Drain the tofu for 10-20 minutes (I do this by placing it in-between two plates with a heavy book or weight on top, with a paper towel on each side to help absorb the liquid).
2. Once the tofu is drained, add it to a large bowl and mash it with a fork – you want the consistency to look like scrambled eggs. Chunks are good!
3. In a small bowl, combine the yogurt, mayo, and curry powder.
4. Add the curry/yogurt/mayo mixture to the tofu along with your red onion, green apple, and/or celery. Stir to make sure the tofu is evenly coated.
5. Enjoy on bread, a top a salad, or as a dip!

*Notes: The ingredients with an asterisk are optional. You can use more or less red pepper flake for a little kick. The onion, celery, and/or apple give some crunch and flavor, but you can choose which you do or do not want to include.

Tell me…
Do you have any favorite no-cook (or minimal cooking required) recipes for summer?

Meatless Monday: Southwestern Pierogi Bake

I participated in a campaign on behalf of Millennial Central for Mrs. T’s Pierogies. I received a product sample to facilitate my review and a promotional item as a thank you for participating.

I’m aware that the title of this blog post may seem a bit confusing; pierogies are typically Polish… so how could I use them in a Southwestern dish?! Well, I’m completely obsessed with Southwestern and Mexican food, so I’ll make it any chance I can. When I was selected to participate in this Mrs. T’s Pierogies campaign, I knew I wanted to do more with them than just serve them as-is with dipping sauce, or with sautéed cabbage. And with 11 different varieties, there’s something for (almost) everyone. Being that I love bakes (who doesn’t like to throw everything into a dish and put it in the oven?) and Southwestern flavors are my favorite, I decided to run with it.

I had visions of this meal the entire time I was running my 15 miler on Saturday, and couldn’t wait to put it all together. It was easy to prepare, and really hit the spot for dinner. Of course I was pretty wiped out after my long run, so I spent the rest of the afternoon and evening on the couch; though I may have even taken a pancake induced nap in the early afternoon. Conveniently, Mean Girls was on (can you believe the 10 year anniversary is coming up?!), so I enjoyed my pierogi bake while watching one of the greatest movies of all time (yes, I said it).

This Southwestern Pierogi Bake is perfect for any night of the week, and can easily be transported for a potluck dinner or party. Plus, it can be made with real chorizo or soy chorizo, so it’s easily adaptable to everyone’s meat preference. I’ve really enjoyed the opportunity to think outside of the box when it comes to pierogi meals. While I love a good pierogi and cabbage mix, this may be my new favorite way to enjoy Mrs. T’s Pierogies!

Southwestern Pierogi Bake | FoodosaurusRex.com

Southwestern Pierogi Bake
– Serves 4 – 

Ingredients: 
1 box Mrs. T’s Pierogies, any variety [I used potato + cheddar]
1 red onion, diced
1/2 green pepper, diced
1/2 red pepper, diced
1 jalapeño, diced [you can use less/de-seed it if you don’t like spice]
6 oz. (soy) chorizo [I used soy chorizo to make it vegetarian, but you can use the real-deal, too]
1/2 cup black beans, drained and rinsed
1/3 cup of chunky salsa
1 cup shredded cheese blend
2 Tbsp oil
2 Tbsp chili powder
2 tsp cumin
1 tsp paprika
1 tsp oregano
salt + pepper to taste

Directions:
1. Preheat oven to 400 degrees
2. Spray a baking sheet with non-stick cooking spray, and cook the pierogies for 10 minutes
3. Meanwhile, heat the oil over medium-high heat, and sauté the onion and peppers for 10 minutes until they begin to soften. 
4. Add the chili powder, cumin, paprika, and oregano, and cook for an additional 2-3 minutes, until combined and fragrant.
5. Turn the heat down to medium, add the chorizo and beans, and cook for another 5 minutes.
6. In a 9×11 baking dish, pour the salsa and layer the cooked pierogies, followed by the sautéed mixture. Top with shredded cheese.
7. Bake an additional 12 minutes, until the cheese is bubbly and golden brown.

Feel free to check out Mrs. T’s WebsiteFacebook, or Twitter for more information and to see all the different kinds of pierogies they offer!

Tell me…
Are you a pierogi fan? What’s your favorite combination? 

Creamy Spring Polenta

While it isn’t spring yet, I’ve been dreaming about it since mid-January. I’ve been buying everything I can get my hands on from Oiselle’s new Spring 14 line, staring at cute floral dresses, and giving my snow boots the side-eye. I must admit that I prefer summer and fall to winter and spring, but at this point, I’ll take anything over winter! I’m just thankful it didn’t snow this past Monday morning like they had originally predicted.

So, with spring only being 16 days away (but who’s counting?) I’ve been thinking about all the veggie packed meals I’ll be making as the days get longer and warmer. Since it was still bitterly cold on Monday, though, I opted for a dish that is still hearty, but included some vegetables that I typically associate with warmer weather. I had this as a main dish, but you can easily have it as a side with some protein. As a mashed potato lover, creamy polenta has quickly become a favorite of mine.

Polenta is a relatively new food for me. I think I had it for the first time in 2010, when I bought the pre-made and packaged kind that comes in a log. I’ve used it in that form quite a few times-usually for some type of bake-but never in it’s original, creamy state. There is a little confusion when it comes to what exactly polenta is, since some recipes refer to it as Italian polenta, while others refer to it as grits, or even just cornmeal. Well I’m here to make it simple for you – it’s all the same! You can use any of the three aforementioned ingredients to make your polenta, I promise!

Before you get to the recipe, though, I want to point you to the note at the bottom of the recipe, since it’s helpful to time everything so the ingredients are all ready at the same time. I oftentimes look at the ingredient list when planning on making something, but never the directions. There have been plenty of times I’ve gone out of my way for ingredients, gotten everything together, and then realized the dinner I was planning to make would actually take 4+ hours. I’d like to say that I’ve learned my lesson, but I still make that fateful mistake every so often. So in the interest of time and making it as easy as possible for you, I added this recipe note to make sure this is a quick and easy meal for you to prepare. 

Creamy Spring Polenta | FoodosaurusRex

Creamy Spring Polenta
– Serves 3 –

Ingredients:
3 cups vegetable broth
1 cup corn grits/polenta
1 tsp olive oil
1 medium zucchini
1 medium yellow squash
1 medium red onion
3 cloves roasted garlic [directions below]
1/2 cup smoked mozzarella
Salt + pepper to taste

Directions:
1. Preheat oven to 400 degrees. 
2. To roast the garlic: Cut 1/4 inch to 1/2 inch off of the top of the head of garlic, making sure to keep the head intact. Drizzle with olive oil and wrap in foil. Bake for 30 minutes and let cool before handling
3. While the garlic is cooking, dice the zucchini, squash, and red onion and combine in a medium bowl. Toss with olive oil, and a dash of salt and pepper to taste. 
4. Spray a baking sheet with cooking spray, and evenly spread the veggie mixture onto the sheet. Bake at 400 degrees for 15 minutes. 
5. Meanwhile, prepare the polenta by bringing the 3 cups of vegetable broth to a boil over medium-high heat in a large sauce pan. 
6. Once the broth is boiling, slowly whisk in the polenta, and turn the heat down to low. Let it simmer, stirring frequently, for 10 minutes. 
7. Add the veggies, roasted garlic, and shredded mozzarella to the polenta, stirring to combine. Serve immediately.

NOTE: To make this time friendly, start with the roasted garlic. After 15 minutes of the 30 minute roasting time has passed, add the vegetables to be roasted. Once the vegetables are in the oven, begin cooking the polenta. That way, everything will be ready at the same time!

Keeping Warm: Slow Cooker Spicy Beer Chili

Thanks for all the awesome comments and sharing of Monday’s post! I am really glad that it resonated with so many of you since it was something I had been feeling for awhile, but wasn’t sure exactly how I wanted to express those feelings. I’m glad to know that I’m not alone in those feelings, but at the same time it’s a shame so many of us feel that way. So what better way to follow a post about body image and food relationships than with a recipe?

I actually made this chili last week when the temperatures were tolerable, but now that they’re back below freezing, the timing is perfect. I have to note that I was able to wear shorts on two runs last week and it was pure magic. On Sunday, I was even able to wear a tank top!

See? Tank & shorts! [Proud member of #TeamPurple for the #PickyGames!]

I should provide a little background for why this chili is “spicy” and how you can adjust your spice level based on your own personal preference. As I’ve discussed before, I love spicy foods. Whenever I’m out and a dish can be made mild, medium, or hot, I almost always go with hot. I say almost because there is a Thai restaurant near my parents that makes their hot dishes so spicy I think they’re barely edible. So when I was in the liquor store a few weeks ago picking up some beer, I noticed a lonesome bottle. The title of the beer is what initially drew me in to take a look, and only once I let it process for a second did I realize what it was. The beer was called Ghost Face Killah. At first I thought to myself “oh, that’s a weird name for a beer.” And then a lightbulb went off. This wasn’t just a beer with funny name; it was a beer with chiles. And not just any chili – the ghost pepper chili (along with Serrano, Habanero, Jalapeño, Anaheim, and Fresno). I bought it without hesitation, and after a few fiery sips, knew it would be perfect in a chili. Yes, it’s spicy, but it also has incredible flavor. I realize this beer may  not be available for everyone, so I’ve made some modifications to my own recipe so in case you can’t find the beer, you can still have a spicy beer chili of your own!

Don't let the poor picture quality fool you - it was delicious!
Don’t let the poor picture quality fool you – it was delicious!

Spicy Slow Cooker Beer Chili
– Serves 4-6 – 

Ingredients:
4 (15 0z.) cans of beans, drained and rinsed [you can use any combination here. I used pinto, black, white, and kidney]
1 (28 oz.) can diced tomatoes
1 red onion, diced
1 yellow onion, diced
1 green pepper, diced
1 red pepper, diced
3 Tbsp chili powder
1 Tbsp cumin
1 tsp paprika
1 tsp oregano
2 cups beer [I used the chili beer, but any beer will work]*
1 jalapeño, diced [depending on your heat preference, you can leave in or remove the seeds and flesh]*

Directions:
1. Add all ingredients to slow cooker
2. Set the slow cooker on high and cook for 3 hours, or low and cook for 6-8.
3. Serve over rice, mashed potatoes, pasta, or other grains with shredded cheese, avocado, and sour cream.
Note: The spice level will depend on the type of beer you use and the jalapeño. If you can’t find the beer but want it to be spicy, add another jalapeño or two (making it 2-3). If you can find the beer but are uncertain about the spice level, you can leave out the jalapeño, or just do 1 cup of the spicy beer, and 1 cup of regular beer. The possibilities are endless!

Meatless Monday: Personal Mexican Pizza

Last week while on Twitter, I jumped into a conversation with Ashley and Dori about pizza. The next thing I knew we had plans to grab pizza the following week (tomorrow!), and all I could think about was having pizza for dinner. I toyed with the idea of ordering some, but then figured it’d be nice to save a few extra bucks (and calories), and so I made  beeline for my refrigerator. I didn’t think I had all of the ingredients to make pizza, but with a few creative adjustments wound up with probably one of the best homemade pizzas I’ve made to date.

There’s nothing traditional about this pizza, but it combines some of my absolute favorite flavors and is easily customizable. I don’t know why I waited this long to use a burrito sized tortilla as pizza crust. I guess it’s better late than never, because this “pizza” is going to become a regular on my weekly menus, that’s for sure. This is hardly a complex meal and comes together in a matter of minutes, so I feel silly labeling it as a “recipe.” But I thought it would be helpful to include the measurements and cooking temperature/time as a guideline.

Personal Mexican Pizza | FoodosaurusRex.com

Personal Mexican Pizza
– makes one personal pizza –

Ingredients:
1 burrito sized tortilla
2 Tbsp your favorite salsa
1 tsp oil
1/4 cup onion, chopped
1/4 cup pepper, chopped (any will do – red, green, yellow, orange)
1/4 cup black beans, drained and rinsed
1 Tbsp chili powder
1/2 cup shredded cheese

Directions: 
1. Preheat the oven to 400 degrees. 
2. Heat the oil over medium heat in a pan. Once the oil is warm, add the chopped onion and pepper, sauté for 5 minutes, or until the onion starts to become translucent. 
3. Add the black beans and chili powder, and cook for an additional 2-3 minutes. 
4. Spray a baking sheet with non-stick cooking spray, and lay the tortilla flat. Spread the 2 tablespoons of salsa evenly across the tortilla. Top with 1/4 cup of the shredded cheese, followed by the sauté mixture. Finish off with the remaining 1/4 cup of shredded cheese.
5. Bake for 10 minutes, or until the cheese is melted and the bottom of the tortilla is beginning to crisp. 

What Vegetarians Eat: Thanksgiving Edition

A lot of times when people find out you’re vegetarian, you get questions like, “So, um, what do you eat?” “Well do you at least eat chicken? Fish?” as well as the always funny jokes about only eating lettuce. And when it comes to the holidays, it can be tricky navigating the buffet table when the main focus of holiday get togethers is food, and often times, they’re meat-based.

Last year I made it easy on myself (read: I was lazy) since it was my first Thanksgiving as an official vegetarian, and I opted to only eat the side dishes. This was easy, because like many, the side dishes are my favorite part. I had stuffing (made with veggie sausage), green bean casserole, mashed potatoes, maple glazed Brussels sprouts, corn and peas, mashed turnips, creamed pearl onions, and cranberry sauce. That’s obviously a lot of food, and I was more than satisfied without having a “main” on my plate. This will likely continue to be my approach for holiday events at a friend or family member’s house, but I’ve decided to get a little more creative this year.

No turkey here! I certainly don't miss cleaning & stuffing it...
No turkey here! I certainly don’t miss cleaning & stuffing it…

When dreaming up my Thanksgiving menu, I decided it was time to try a turkey alternative. No, I’m not talking about a tofurkey – I wanted to make something homemade! While I’ve opted to have a “main dish” this year, that doesn’t mean I plan to skimp on the sides; they are my favorite part! And since meal planning is something I really enjoy doing, I figured I would share with you all what I plan on serving for my Vegetarian Thanksgiving! That way, if you’re scrounging around for a last minute side dish idea maybe one of these will spark your interest, or, you can always save them for next year.

2013 Vegetarian Thanksgiving Menu
Seitan Roast – recipe found here

Brussels Sprout Mac ‘n Cheese – recipe found here
Veggie Stuffing – my recipe found here
Peas & Corn
Mashed Potatoes
Apple & Cranberry Crumble

I’m going to be so full, and I’ll have leftovers for days. It’s going to rule.

What’s your favorite side dish? 

Accepting Fall & A Giveaway Winner

First up, the winner of my Oloves Giveaway thanks to Random.org is commenter #2: Lauren G.! Send me an e-mail with your shipping information and the olives will be on their way!

****

My favorite season is summer, and I have no problem admitting that each year as fall creeps up, I get a little sad. Sure, fall means apple picking, cider, cooler (but not cold) weather, pretty foliage, etc., but it means we’re that much closer to winter, which I dread. It probably doesn’t help that I’m not into the whole pumpkin obsession either (except for pumpkin beers) since I don’t really love the flavor. Despite my love affair with summer, I don’t loathe fall – I appreciate all the things that come with it, especially when it comes to food and fashion.

Even though peach season is almost over, it’s perfect weather for apples here in New Jersey. So my fresh box the last few weeks has included peaches and apples, resulting in an overflowing crisper drawer full of the two fruits. My sister is a baking fiend, and any time she’s home, she’s in the kitchen just throwing together desserts on a whim. While she was still home during the summer she made a phenomenal peach and blueberry crumble, so I decided to try an recreate it with peaches and apples.

I love cooking, but baking still intimidates me. Some people (like my sister) just have a knack for baking and can throw things together easily; that definitely isn’t how I roll. I’m extremely comfortable in the kitchen cooking savory dishes, but for whatever reason, baking requires a different level of confidence I just don’t have, so I rely heavily on recipes when it comes to baking. But this past Sunday, I went a bit out of my comfort zone and threw together this simple peach and apple crumble, that is perfect for breakfast, a snack, or dessert!

Peach & Apple Crumble | FoodosaurusRex.com

Peach & Apple Crumble
– serves 4 – 

Ingredients:
2 apples, seeds removed and sliced (I used Gala, but you can use your favorite type)
2 peaches, pitted and sliced (I used white peaches, but same applies here – any kind will work)
2 Tbsp butter, cut into little pats (8 squares)
2 tsp flour
1 tsp brown sugar
1/2 tsp cinnamon
Pinch of salt
For Crumble:
1/4 cup flour
1/4 cup rolled oats
1/4 cup brown sugar
1 1/2 tsp butter, cut into little pats

Directions:
1. Preheat oven to 350 degrees
2. In a medium bowl, mix together the apple and peach slices, flour, sugar, cinnamon, and pats of butter.
3. Spray a a cake pan with cooking spray, and add in the fruit mixture. 
4. In the same bowl you had the fruit, add the remaining flour, sugar, butter, and oats. Use a fork to mix everything together, slightly mashing the butter in the process. Sprinkle the crumble on top of the fruit. 
5. Bake for 30-35 minutes or until the crumble is golden brown.