Diet-to-Go: Delicious At Your Doorstep

Even though I absolutely love cooking and spending time in the kitchen, sometimes it’s nice to have your meals prepared for you. A lot of nights after a full day of work and running, the last thing I want to do is spend 30+ minutes in the kitchen making myself dinner. Unfortunately, the “quick and easy” options don’t always translate to the healthiest options. I’m not a stickler for healthy foods and do my fair share of indulging, but at the end of the day, I like to make sure I’ve eaten enough of the right foods to keep my body fueled for not only running, but life in general. So, when I was given the opportunity to try out Diet-to-Go as a Fitfluential Ambassador, I jumped at the offer.*

One of the first things that caught my eye about Diet-to-Go was their accessibility – it isn’t just a one size fits all approach to diet meals. In fact, they have three different choices; traditional (which is low fat), vegetarian (lacto-ovo), or low carb with 1200 or 1600 calorie options. And, within those base selections, you have the ability to even further customize your meal choices; you can make substitutions, change your meal plan type, and even pause your plan! They also offer 5 or 7 day plans, and you can have breakfast, lunch, and dinner, or just lunch and dinner. Talk about options! And the best part? The meals that are delivered to your door are fresh, which I learned isn’t something that all mail order diet meal plans do.

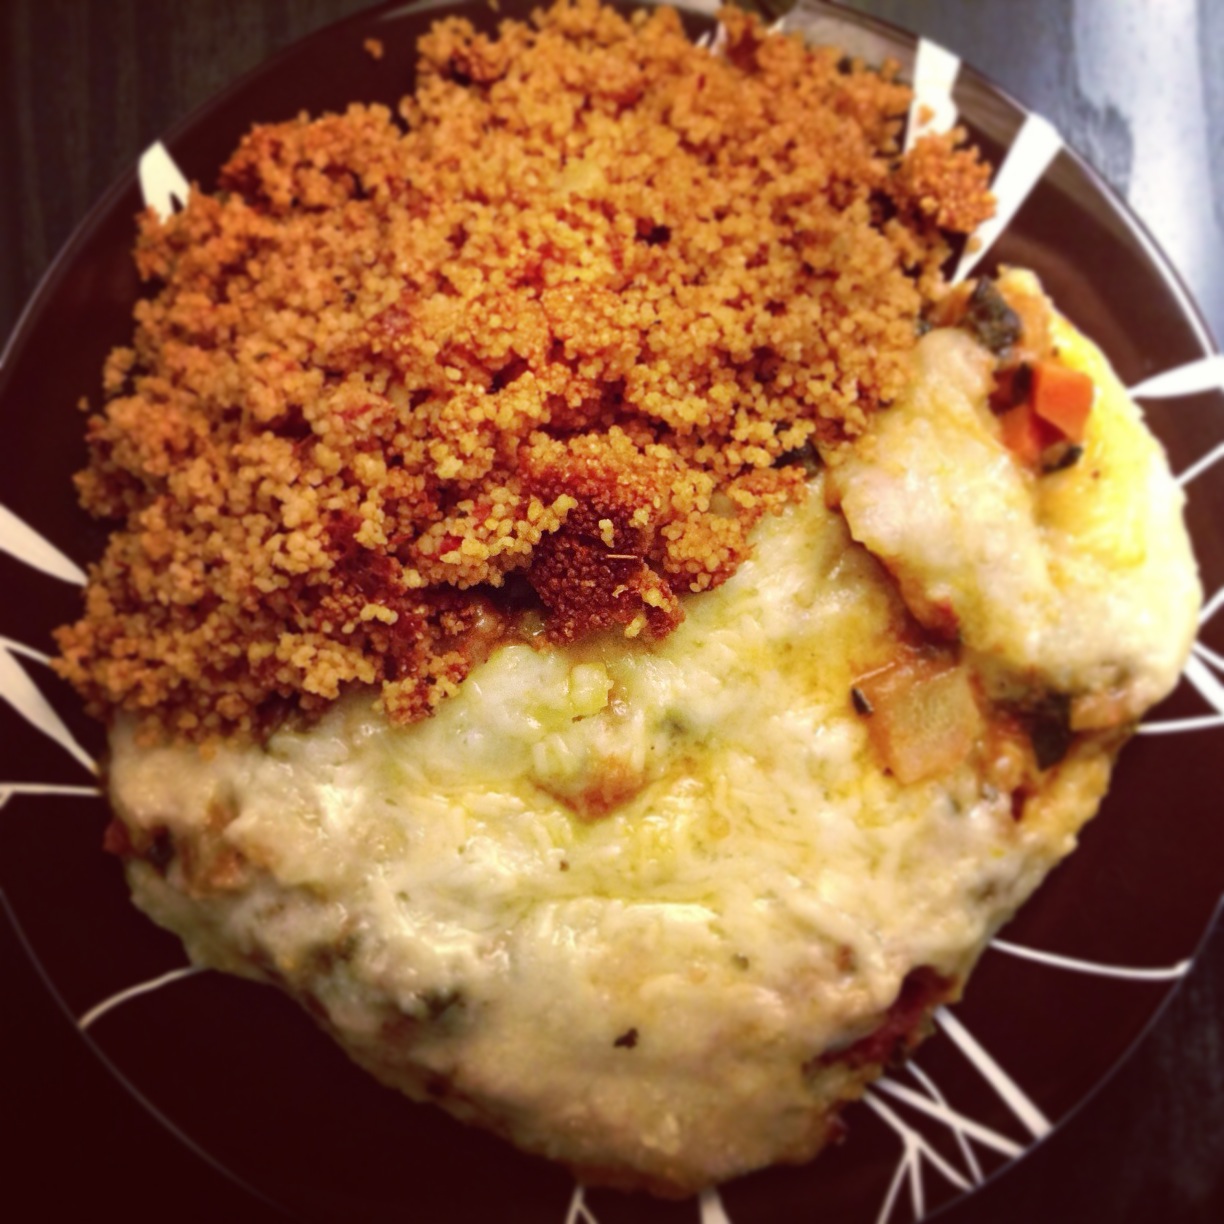
Now for the good stuff – the food! My meals arrived on Tuesday and I started with dinner. Obviously being a vegetarian I chose the vegetarian meal plan, and my meals came from the 1600 calorie per-day group. I decided on my first meal, tomato pie and couscous with some crackers and a Laughing Cow Swiss cheese wedge. I am a Giant Sports fan and follow a strict diet and I’m pretty sure this was the first time trying Laughing Cow, and I can’t believe it’s taken me so long – it is absolutely delicious! I had the cheese and crackers first while I waited for the entrée to cook, and once it was ready I dug in. Not only was the dish flavorful, but it was filling! I would be lying if I didn’t say I was skeptical that I’d be full after this diet meal (especially having run 5.5 miles earlier), but I was. I added a salad to the mix as well (I make sure to have one pretty much every night – nothing special, just spring mix with some dressing) in order to round out the day’s fruit and veggie intake. I definitely picked the right meal to start of my experience; I couldn’t wait for the next one.

My first meal - Tomato pie & couscous!
My first meal – Tomato pie & couscous!

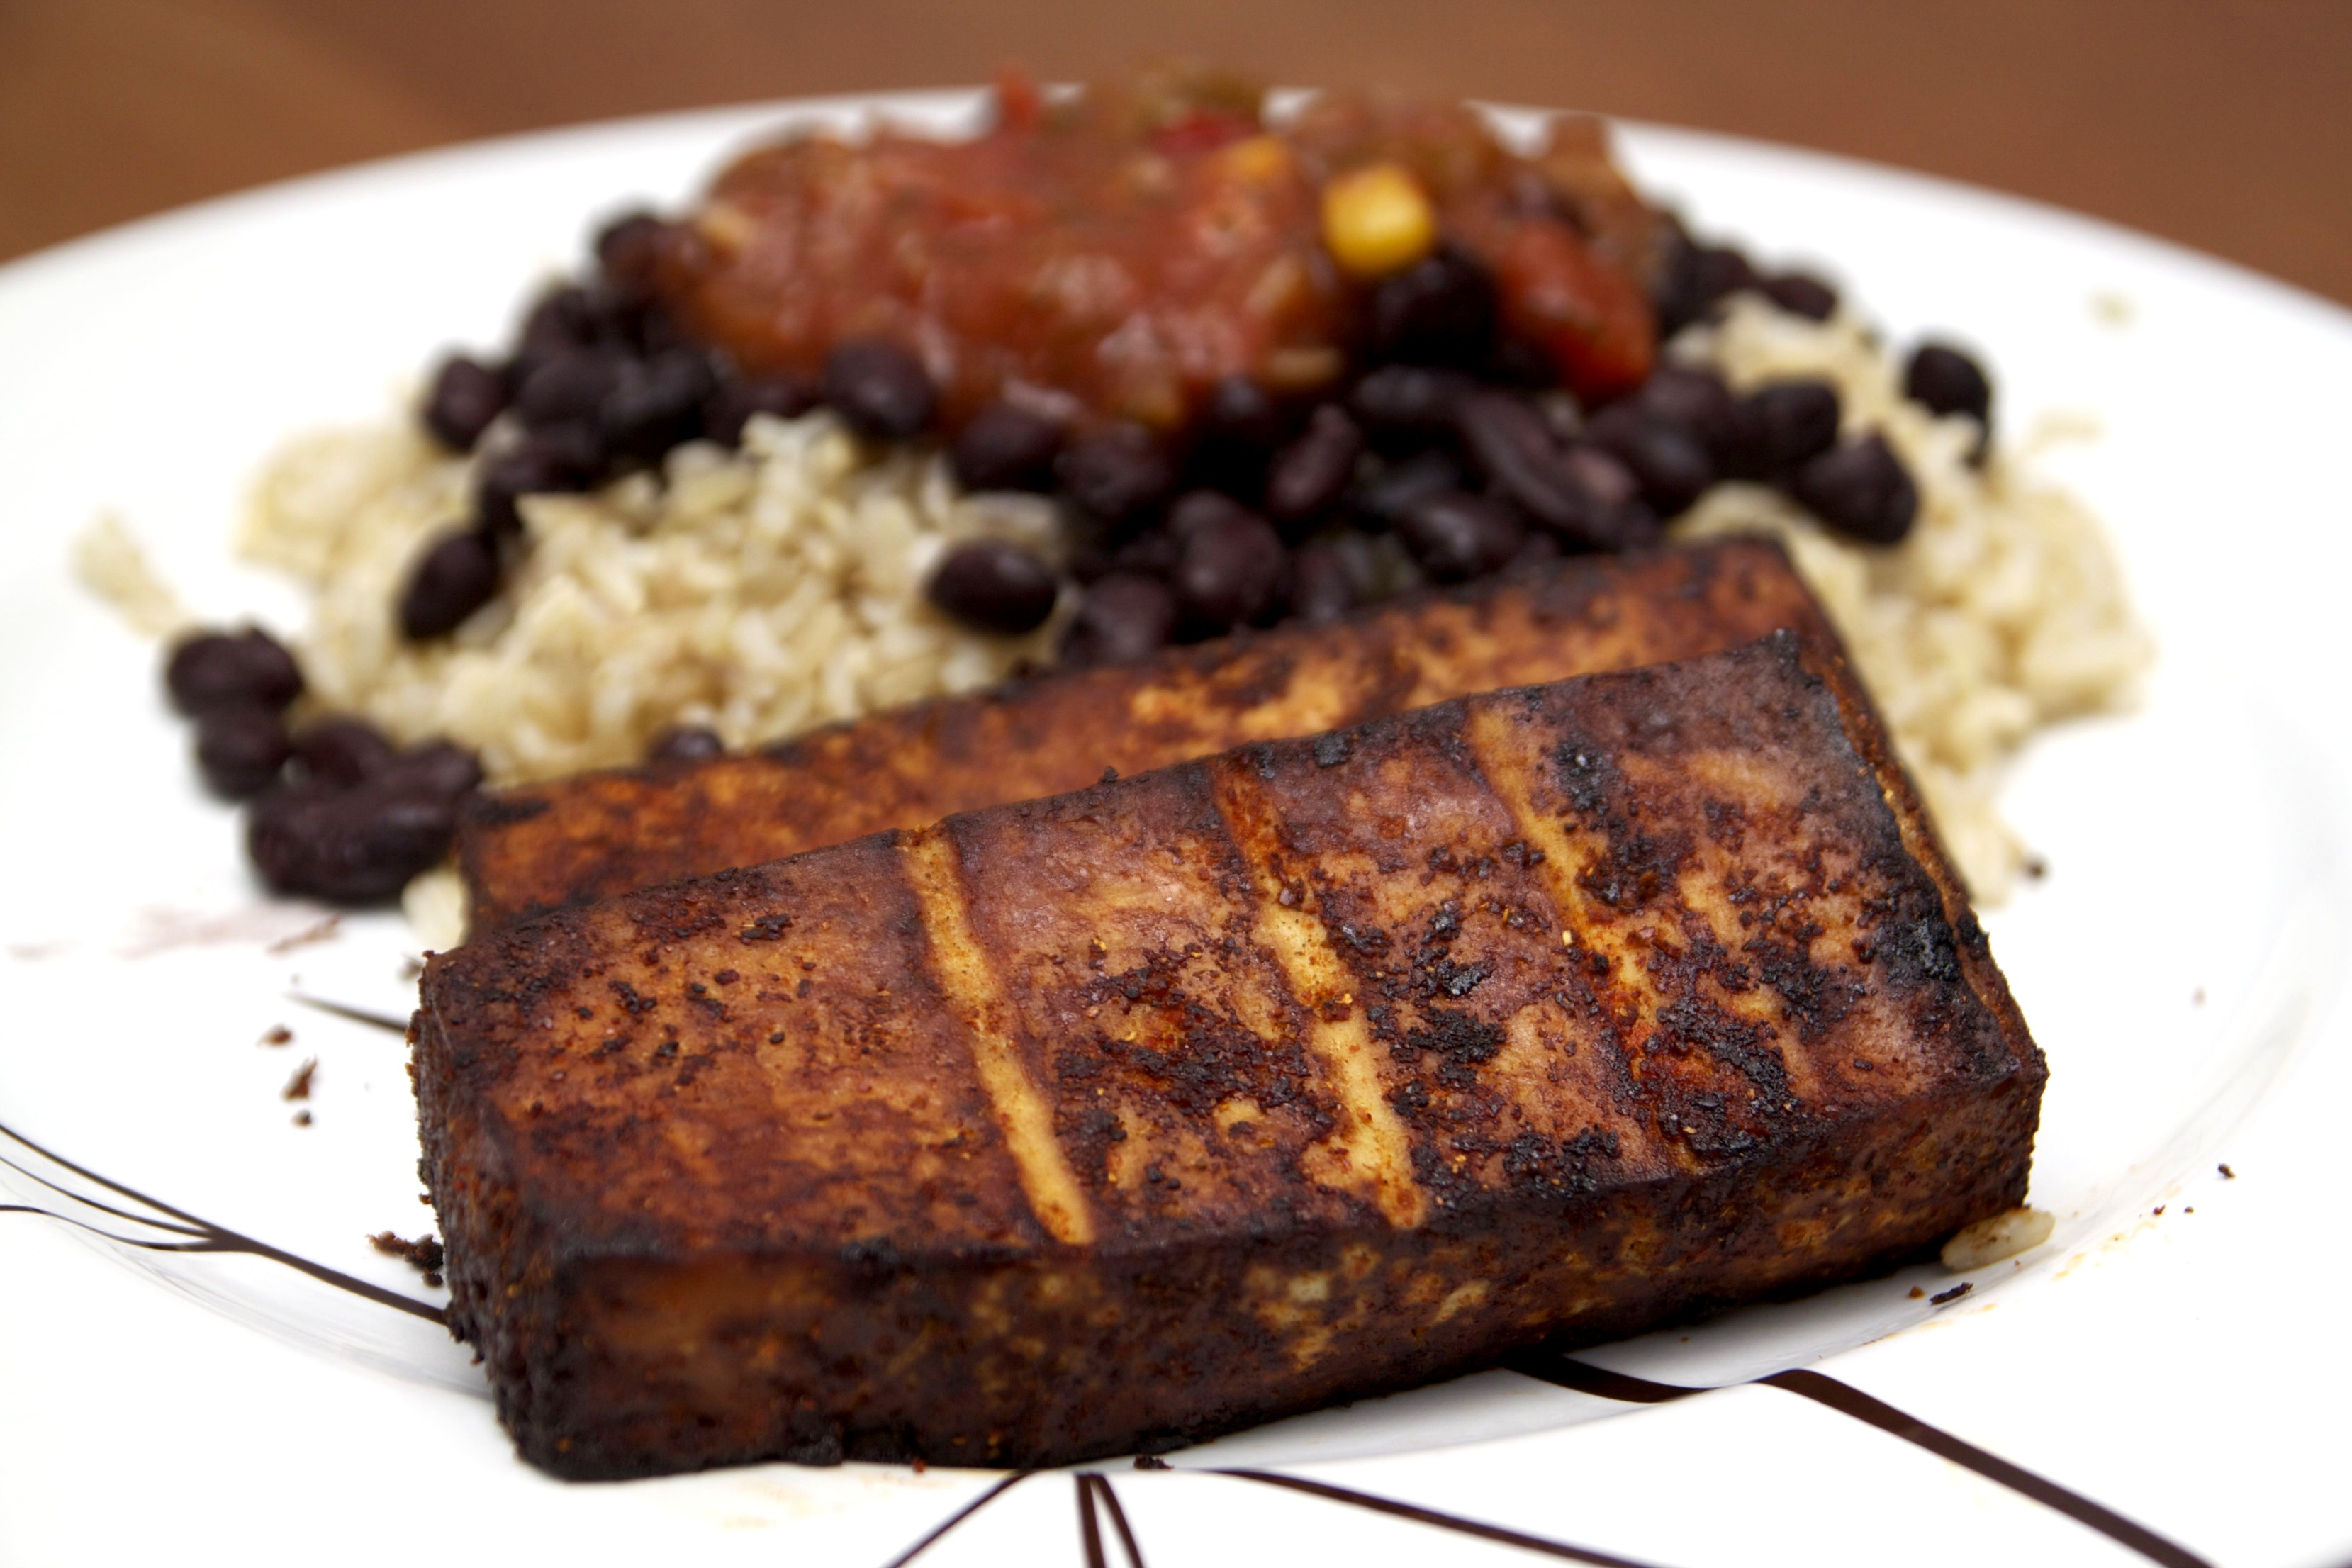
The rest of my meals did not disappoint. Whether it was eggs florentine with soy sausage patties and asparagus for breakfast, bean burritos for lunch, or a lentil loaf for dinner, I was always pleasantly surprised by the taste and texture of the options, and was satiated. I kept saying “wow, I can’t believe this actually tastes good!”

Added some hot sauce for good measure

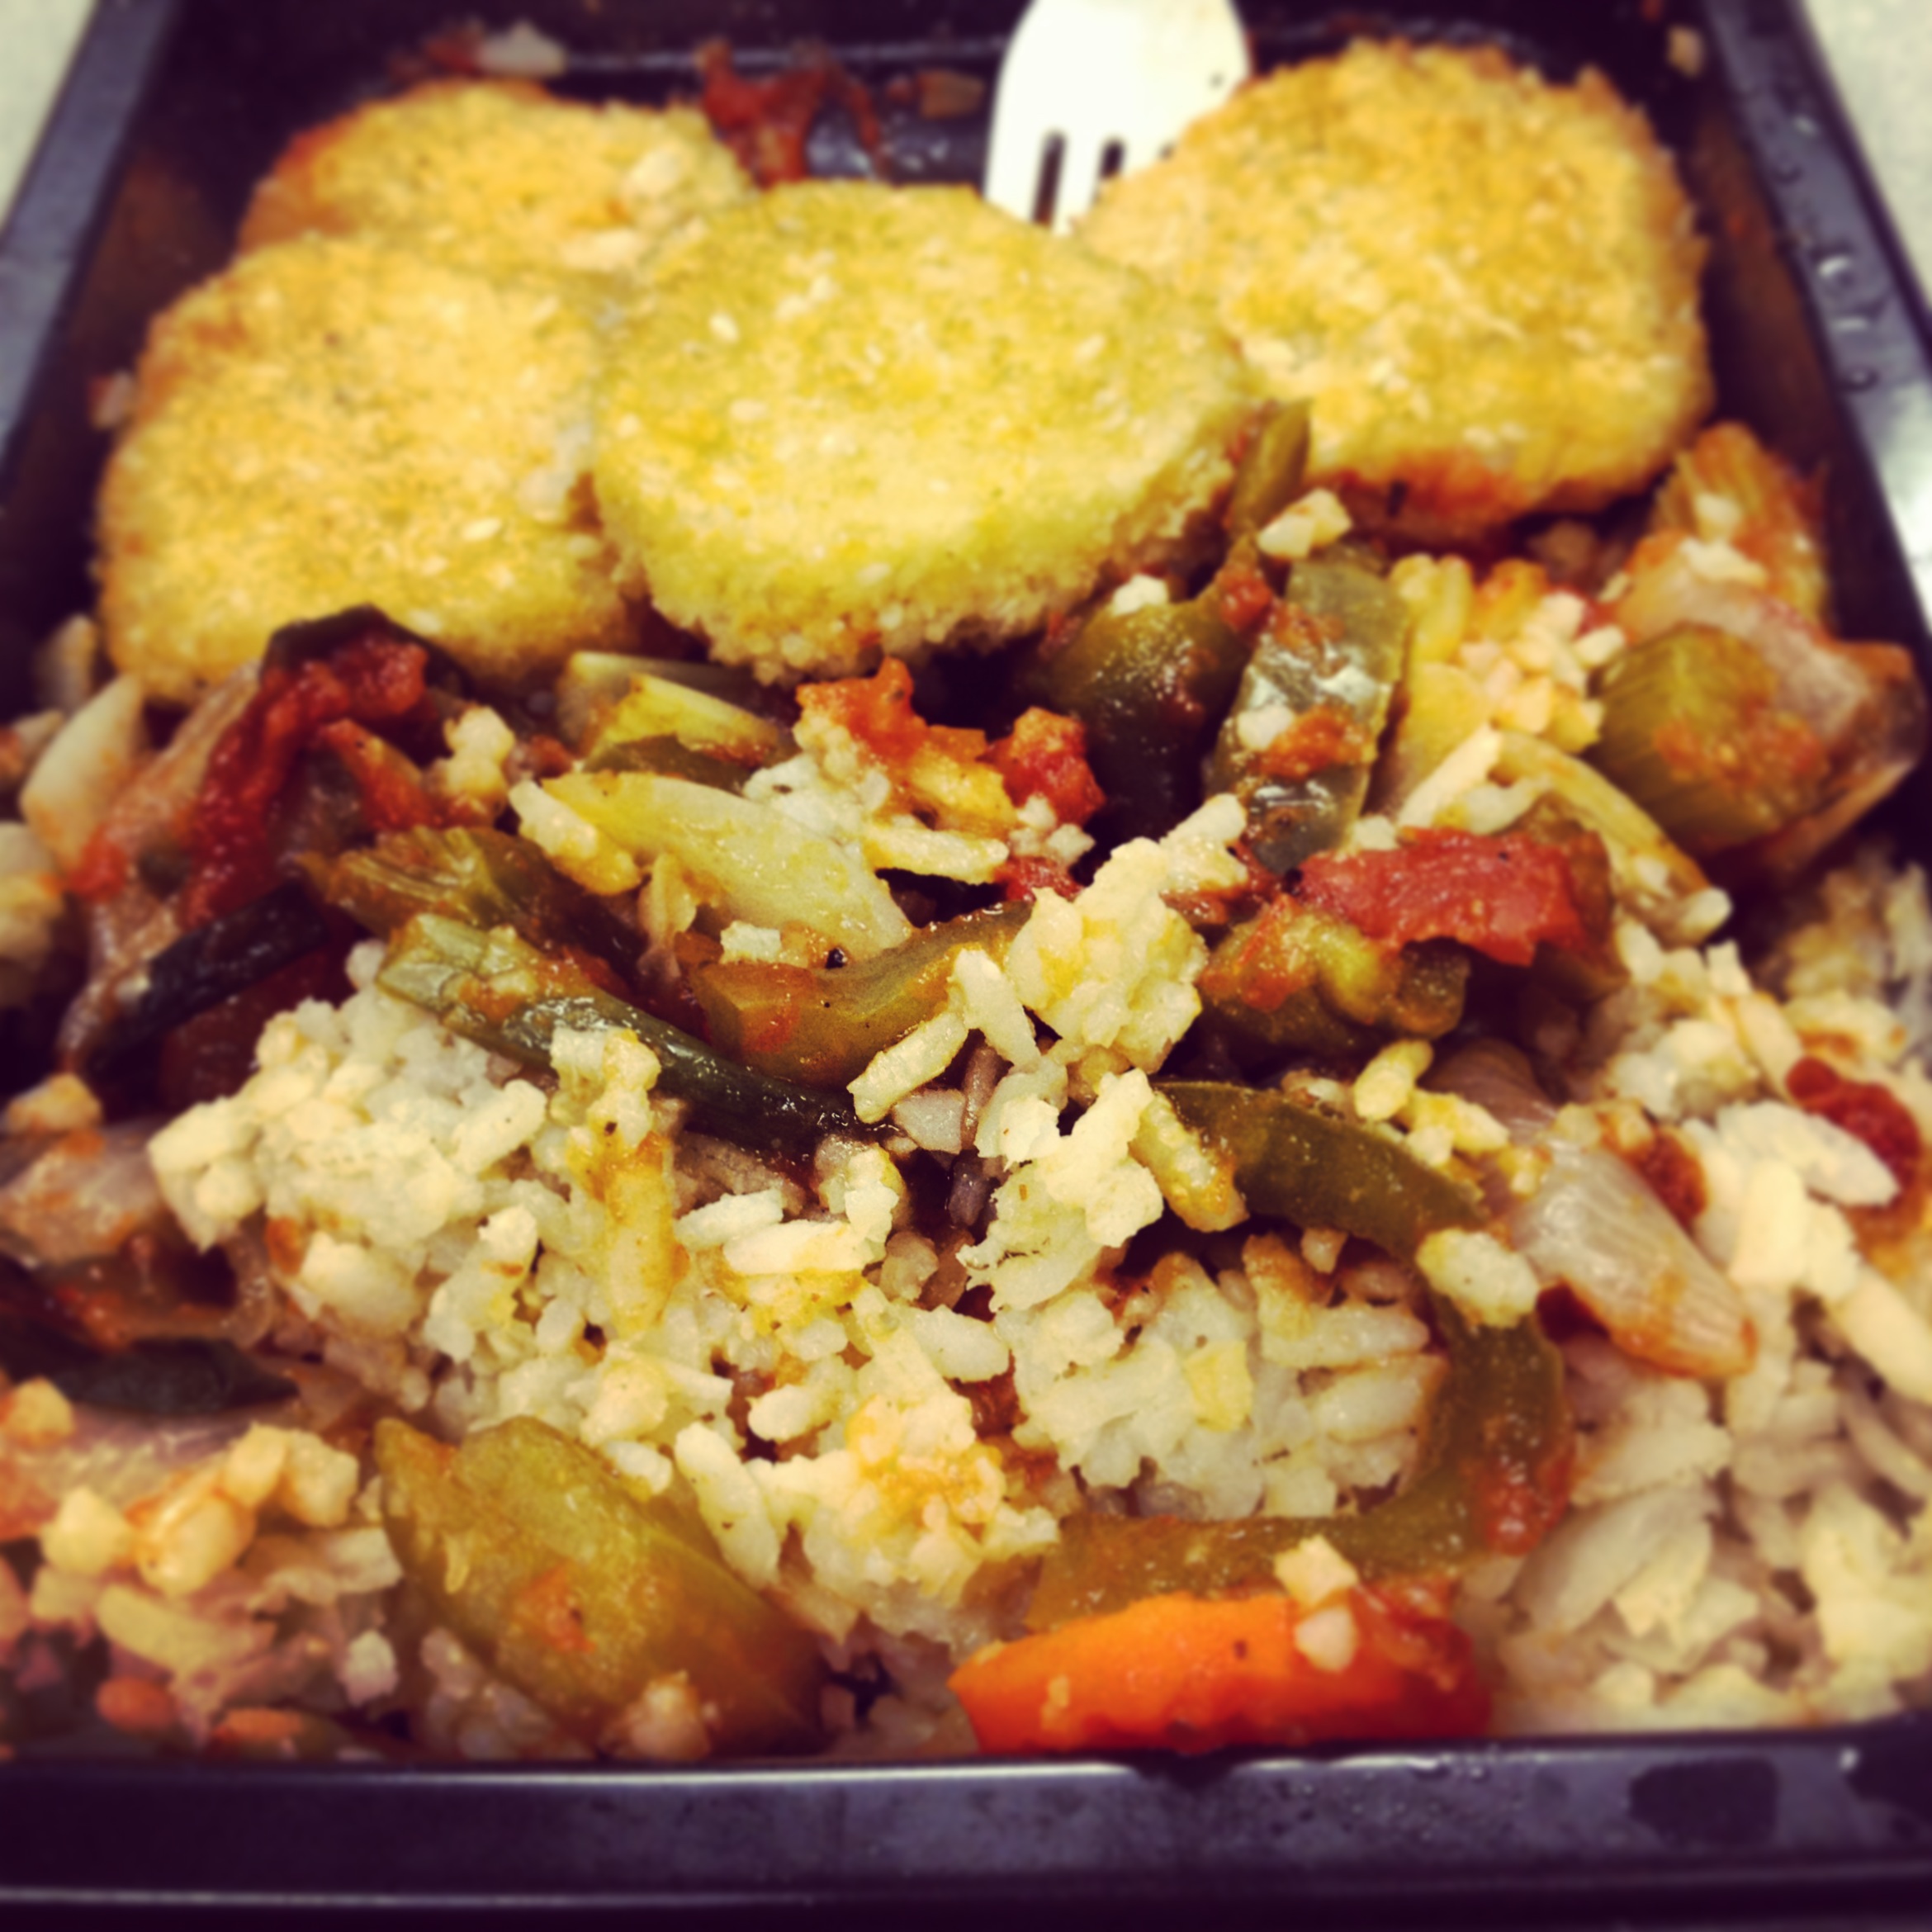
Of course since I’m not a registered dietitian I can’t speak to the overall nutritional value of these meals, but I think that it’s important for anyone (on a “diet” or not), to do research and ensure they’re getting the right nutrients. Some of these meals were on the saltier side for me, while others seemed to be higher in fat, or overall calories. Because high blood pressure and heart issues run in my family, I try to be cognizant of my sodium levels, while also understanding that as a runner, salt is important. In terms of higher-than-I’d-like sodium, for example, a suggested day is the eggs florentine with soy patties and asparagus (delicious) which give 830mg of sodium at breakfast, followed up with a grilled veggie burrito with polenta at lunch for 650mg, and then a lentil loaf with sweet potatoes and green beans for dinner with 1030mg. That brings my sodium totals to 2510mg in one day (if I don’t eat anything else). The Institute of Medicine recommends 1500mg of sodium per day as an adequate amount, and to try and stay under 2300mg (source). This is just one day, and not all of the meals are high in sodium, but because of those levels I don’t know that I myself would use Diet-to-Go for 3 meals a day, but rather as a supplement to add in quick and easy healthy options throughout the week.

Stuffed shells w. pesto sauce, carrots, and a roll.

Trying out these meals really opened up my eyes to the way I eat throughout the day, the food choices that I make, and what different calorie amounts really look like. For me, I tend to eat smaller or lower calorie foods in the morning and afternoon, but then find myself ravenous by the time I get home from work and wind up not only matching my calories from the first half of the day, but I usually have more. For the most part I’m not concerned with the weight aspect of eating since I am running 25-30+ miles a week, but I am concerned with the nutritional value and making sure my body is getting the right foods. Lesson learned: I need to eat more in the morning!

Super easy and delicious lunch at work - soy nuggets and creole veggies over rice!
Super easy and delicious lunch at work – soy nuggets and creole veggies over rice!

Mail ordered meals may not be for everyone, but for people that just don’t have time to cook or don’t like to cook, I think this is a great option. As I said earlier, I think it’s really important for people to understand their nutritional needs based on their age, sex, activity level, and overall lifestyle before they decide on a meal plan that’s right for them (whether they’re making it themselves, or having it made for them). Diet-to-Go has a lot of great options and flexibility, is delicious, and if nothing else can help people newer to the world of eating right form good habits. Not to mention it did win Epicurious’ #1 voted meal plan based on a national blind taste test! So for those of you that are interested in giving it a try, you can get 20% off by using the code “fitfluential” when ordering.

So tell me…
Do you track your eating throughout the day? 
How do you  make sure you’re getting enough of the right foods? 

*Disclosure: Fitfluential LLC compensated me for this Campaign. All opinions are my own.

Perfect Tofu

Of course on the same day I blogged about not having any good recipe ideas, I came up with what I’d like to think is a pretty decent tofu marinade. I know a lot of people aren’t tofu fans, but as a vegetarian, the big ‘ole block of soy is a really versatile way for me to get some extra protein. As long as you have a good marinade and cook it properly, I think it can be really delicious. Up until this point, my favorite was this Spicy Peanut Baked Tofu, which is easy, but not extremely versatile. I’ve never really used tofu outside of stir-fry styled dishes or egg replacements, but I’ve seen plenty of seasoned and marinated tofu “steaks” in stores, so I figured I would try my own.

One thing I’ve noticed in most vegetarian recipes that attempt to be meat replacements, is the use of soy sauce. So, I went to my pantry, grabbed a whole bunch of spices that I thought would go well together and soy sauce, and got mixing. This can be thrown together in a matter of minutes, and the beauty of a marinade is that the longer it sits, the better it winds up tasting. I served these tofu “steaks” with some brown rice, black beans, and salsa. I think it would probably be equally as delicious on a baguette with sautéed onions and peppers… I’ll definitely be trying that next!

TofuSteak2

Baked Tofu Steaks
– Serves 2 –

Ingredients:
1 package extra firm tofu
1/4 cup soy sauce
1 Tbsp liquid smoke
1 tsp chili powder
1 tsp garlic powder
1 tsp curry powder
1/4 tsp cayenne

Directions:
1. Preheat oven to 350 degrees.
2. Press the excess water out of the tofu (for at least 10 minutes). If you don’t have a tofu press, a big cookbook with the tofu between two plates will work – just make sure you have a towel under it! 
3. In a bowl, mix together all of the marinade ingredients (soy sauce, liquid smoke, and spices) and pour into a shallow baking dish or tupperware container.
4. Slice the tofu in half long-ways, and then in half again so you have 4 rectangular pieces.
5. Place the tofu in a single layer in the baking dish with the marinade, and let sit for 15 minutes. After 15 minutes flip to the other side, and allow it to sit for an additional 15 minutes.
6. Place the tofu on a greased baking sheet and bake for 30 minutes, flipping half way through.
7. Serve with rice and beans for a Southwestern flare, enjoy on a baguette, or by itself!

Blogging Slump

I think “slumps” are a natural progression of life. I can’t tell you how many different kinds of slumps I’ve experienced over the last 26 years, but in that time, I’ve learned how to deal with them. They can be frustrating, time consuming, and disheartening (depending on the situation). Swimming was where I experienced most of my slumps – losing the groove of a stroke, trying a new distance, being burnt out, or in the early years, still getting used to my body and adapting to it in the water. Even though they can be a pain, the good news is that slumps aren’t forever. Enter: the blogging slump.

This blog is something that I really enjoy. It’s opened me up to a world that I really don’t think I would have experienced otherwise. I’ve met and connected with some really amazing people and companies, and have been able to fuel and embrace passions of mine in a like-minded community. Similar to slumps, interests change, and come and go over time. Recently I’ve found myself less and less interested in food blogging, and much more passionate about running and life in general. Now don’t get me wrong, I still think about food pretty much all the time and love spending time in the kitchen, I just have come to a stand-still when it comes to recipe creation. Most of my weekly meals come from cookbooks or other blogs, or are recipes I’ve already shared. So in that situation when you have a blog that’s dedicated mostly to food, content becomes tricky.

One of the key components of writing a blog is finding your niche, which is something I’ve been struggling with lately. I’m not really a “food blogger” like I had once set out to be, nor am I a running blogger (though I do blog about it quite a bit), and I’m certainly not a healthy living blogger (pass a cupcake, please). I have plenty of ideas to blog about, but I usually get a few sentences or paragraphs in and jump ship. Most of the time I think that’s because I care too much what other people think. To an extent I should because this is a blog that I want people to read and enjoy… but at the same time, it’s mine! A big reason why I’ve been so hesitant just to post what I want is because of my blog name; I mean, hello, it’s called FOODosaurus Rex… so there should be some food element. And really, that’s why my posting has been so sporadic. One week I’ll spend a lot of time in the kitchen and dream up some share-worthy recipes, run a race, and boom – content. Another week will be less than exciting, with running and maybe a note worthy (but not newly created) meal here and there. It leaves me unsure on what I should post – there’s nothing I loathe more than a junk post (i.e. a photo dump, posts round up, etc.).

So as I continue having a blog identity crisis, I’m looking for some input from you, the reader! In the meantime I’ll be carrying on with business as usual, posting running and food related things, when and if the mood strikes!

What would you like to see more of on the blog? Less of? 
Any tips to help get me through the slump?

Enough For Me & You

Whenever I make a recipe that provides enough for leftovers, my appreciation for the recipe doubles. Why, you may ask? Because it gives me either a delicious option for lunch the next day, or even better, a night off in the kitchen! A lot of recipes I make suggest that they are at least 4 servings, but I rarely find myself with leftovers (between the two of us in the house). So, whenever there’s a huge casserole or Dutch oven meal on the week’s menu, I can count on that providing me some type of leftover; whether it’s enough for one or two people is another story.

As always, I try to make sure that my meals are as balanced as possible; vegetables, protein, healthy fats… you know the drill. Since I take medication daily, my gastroenterologist likes for me to have blood work every so often just to make sure the medicine isn’t affecting anything negatively. I actually just had some routine blood work last week, and they mailed me a copy of the results. I’m happy to report that pretty much everything was within the “normal” range! I’ve got plenty of blood protein, calcium, and all the other goodies that people often swear vegetarians don’t get enough of. So even though my gut doesn’t work properly, my blood is in good shape! At least I know I’m doing something right.

But now that we’ve talked about my blood, let’s get back to food… I’m currently trying to ramp up my mileage (only a little) and intensity (a little more) for a half marathon in April. I’m actually running two half marathons in April – the RU Unite Half Marathon that I’ve run the last 3 years (and was my first!), and then a week later the Nike Women’s Half. I’m hoping to PR at the first, and then enjoy the second. I would love to run a 1:45 (or faster, of course), and I think it’s possible since I had to walk a few minutes due to a side cramp last year and finished in 1:47. As always, running has seriously increased my appetite, which is huge to begin with. So, when I found a big ‘ole strata recipe on Martha Stewart’s website, I knew I had to make it.

I had to make some changes to the recipe, most notably because one of the main ingredients was sausage. I’ve been completely obsessed with soy chorizo the past few months, so I knew that would be a perfect replacement. I’ve had the soy chorizo from both Trader Joe’s and Stop & Shop, and they are both equally delicious, and easy to use in anything from a burrito to an omelet. This particular recipe includes things I love; spicy chorizo, eggs, bread (yay carbs!), cheese, and a solid dose of leafy greens. It’s perfect to whip together before work and then cook when you get home, make the night before having brunch, or do all at once (since it really doesn’t take that long). I love the versatility of stratas, and this recipe is no different!

ChorizoChard

Vegetarian Chorizo & Chard Strata adapted from Martha Stewart
– Serves 4 –

Ingredients:
1 package of Soy Chorizo (or 1lb. of regular chorizo)
1 tbsp olive oil*
1 small onion, diced (can be yellow, white, Spanish)
1 bunch of Chard (Swiss or red), roughly chopped
1 baguette (day old is best), sliced into 1/2 inch pieces
1 cup of smoked Gruyere or Gouda cheese
7 eggs
2 1/2 cups of milk (any dairy or non-flavored and unsweetened non-dairy kind will do)
Salt and pepper to taste

Directions:
1. Preheat oven to 375 degrees.
2. In a medium sauté pan, cook the chorizo and set aside.
3. In the same pan, add the olive oil and sauté the onion until translucent, about 5 minutes. *If you are using real chorizo, you do not need to add the oil – you can use the fat from the meat.
4. Next add in the chard, salt, and pepper, and cook until just beginning to wilt, about 5 minutes. 
5. In a 9×11 greased baking dish, layer half the chorizo, followed by the chard and onion mixture, then sliced baguette. Follow with another layer of chorizo and then chard. 
6. In a medium bowl whisk together the eggs and milk. Pour over the casserole dish, doing your best to distribute evenly. Top with cheese. Let sit for at least 30 minutes, but can go up to overnight. 
7. Bake covered with foil for 45 minutes. Remove the foil and bake for an additional 10 minutes. Let sit for at least 5 minutes before slicing and serving! 

Do you have any favorite dishes you make that always give you leftovers?

Cheesy Bake

I hope that everyone survived winter storm Nemo! I celebrated my mom’s birthday AND 6 month vegetarian anniversary on Friday by sitting inside anxiously awaiting the skies to open and dump snow on us. It was a welcomed day on the couch (working, of course) after taking an evening Bikram yoga class the night before. It was my first class, and since I bought a 30 class card, I will definitely be writing about it in the future! Despite the not-s0-great weather, I did make a mean mac ‘n cheese that I wanted to share.

So ridiculous
So ridiculous

[source]

For anyone that knows me, they know that menu planning is something I really enjoy doing; you can find me scouring the internet (mostly blogs and Pinterest) and cookbooks most days of the week looking for inspiration for meals weeks in advance. I’m usually thinking about my next meal before I’ve finished the one in front of me! I make the recipes as instructed a decent amount of time, but I often tweak a few things based on what I have in the house, or my personal taste preference. It usually isn’t enough of a change to warrant a blog post about it, but every once in awhile I do take a recipe and really make it my own, using the original more as a loose guide and inspiration. So, when I found Budget Byte’s Jalapeno Popper Mac ‘n Cheese, I knew immediately I was going to make it. I just didn’t know until about half way through that I was going to change a lot of it.

Baking macaroni and cheese is awesome. Who knew that adding a little bit of breadcrumbs and throwing it in the oven for a few minutes would add so much texture and flavor to such a simple kitchen classic! Using three different kinds of cheeses may seem like overkill to some, but to a cheese lover like myself, there’s no such thing as too much! The cream cheese definitely kicks this over the top (I need to cook with it more). This version isn’t spicy (to me), so if you want to kick it up a notch feel free to add more jalapeños or some other kinds of peppers. It’s a perfect recipe for a cold winter night (which we’ve been having a lot of recently), or to bring to a potluck. You won’t see this on any “skinny” or “diet friendly” lists, but it’s definitely something you should make and enjoy (in moderation of course).

MacsAndCheeses-001

Jalapeño Popped Baked Mac ‘n Cheese adapted from Budget Bytes
– Serves 4-6 –

Ingredients:
1 lb. pasta (elbow, spiral, etc.)
1 Tbsp oil
2 cloves of garlic, minced
1 1/3 cup milk
5 oz. cream cheese
1/3 cup parmesan cheese
1/2 cup plain Greek yogurt
2-3 jalapeños, diced
1 1/2 cups shredded cheese (any variety will work)
1/2 & 1/4 cups of Panko style bread crumbs

Directions:
1. Preheat oven to 350 degrees.
2. Bring a large pot of lightly salted water to a boil. Add the pasta and cook according to the package. 
3. As the pasta cooks, make your cheesy roux by combining the oil and garlic first in a sauce pan over medium-high heat, cooking for 1-2 minutes.
4. Next, add in the milk, parmesan cheese, and cream cheese. Cooking until the cream cheese is melted and everything is combined. Add the Greek yogurt and jalapeños. 
5. Drain the pasta, and add it back to the original pot. Pour the cheesy jalapeño mix and 1/2 cup of the Panko bread crumbs over the pasta and stir to combine. 
6. Fill a greased 9×9 baking dish with the macaroni and top with the remaining 1/4 cup of bread crumbs and shredded cheese. 
7. Bake for 15 minutes, or until the top is starting to brown. Let it sit for 3-5 minutes before digging in! 

Photography

It’s no secret that my blog pictures aren’t that great. Most of the time I snap them with my iPhone, and when they actually look somewhat decent, it’s because I’ve asked my husband to take it for me. Since I started blogging back in 2009, I always knew improving my photography skills (read: gaining any type of “skill” at all), was something I needed to do… but I never took the steps to actually do it.

Last week my husband bought himself a new camera, and so I inherited his Canon Rebel T1i (he got the snazzy Canon 6D)… meaning it was time to finally tackle photography. I’ve always enjoyed photography, and oftentimes help my husband set-up shots. However, I lack patience and have never really been able to take the time to play with settings, let alone edit the photos after the fact. But I woke up on Sunday morning with the drive to get my picture taking on.

Despite the fact that it was 30 degrees out with winds making it feel closer to 20, I set out to take a few photos in the beautiful sun. They’re my first attempts at real photography, but since I was somewhat pleased with the results I figured I would share them. These were all taken at Rutgers University’s College Avenue campus. You can click on each photo to enlarge it.

I’m looking forward to learning more about photography (my head is spinning with aperture, ISO, shutter speed…), and not only improving the blog’s content, but taking pictures I’m proud of!

Buffalo Bill

Well would you look at that, TWO references to It’s A Wonderful Life within two posts this month (you know, when Mary and George are on their way home and they’re singing?). Must just be the time of the year! For those of you that were thinking about Silence of the Lambs and got freaked out, don’t worry, we aren’t talking about lotion or anything. Instead, we’re talking about Buffalo Stuffed Shells!

There hasn’t been much going on in my neck of the woods aside from working, running, and enjoying the Holiday season… which is more than okay by me! It’s definitely been interesting to navigate the Holidays as an “official” vegetarian, which I have been for almost 5 months now. I get asked the typical questions such as “why?” and “do you eat chicken? at least fish?,” and sometimes odd questions like, “you mean you don’t eat bacon?!” The easiest way I’ve found  to combat the weird looks is to make delicious food that everyone can eat – then I don’t have to worry about eating just chips for dinner, or inconveniencing anyone with my dietary needs. Plus, it’s making me cook more which is something I want to do in the coming year. I’ve cooked a lot, but most of it has been things from Pinterest or things I’m comfortable making. I decided to start early with this recipe and hopefully I can keep it up!

Despite being on the vegetarian train, I still have cravings for things like cheeseburgers and buffalo wings, with my favorite substitute for wings to date being this buffalo cauliflower. I’ve also made buffalo lasagna  and figured I’d try my hand at buffalo stuffed shells. I love stuffed shells (especially the Mexican variety), so I hoped the shells would work with a buffalo flavor – and they did. While I used ricotta cheese, this could easily be made vegan with tofu and a dairy-free shredded cheese. And if you aren’t vegetarian, you could definitely add some shredded chicken to the mix.

StuffedShells-001

Vegetarian Buffalo Stuffed Shells
– Serves 4 – 

Ingredients:
14 jumbo pasta shells
8 oz. low-fat ricotta cheese
1 cup Frank’s Red Hot buffalo sauce (or other “wing” sauce)
1/2 cup smoked cheese, shredded (I used applewood smoked gruyere)
1/2 cup shredded cheese (mozzarella or a cheddar mix works)

Directions:
1. Preheat oven to 350 degrees.
2. Cook the pasta shells according to the package. I like to throw in a few extras in case some fall apart/break while cooking.
2. In a medium sized bowl, mix together the ricotta cheese, 3/4 cup of the Frank’s, and smoked cheese.
3. Once the shells have cooked and cooled enough so you can touch them, fill each shell with 2-3 tablespoons of the cheese and Frank’s mixture. Put the shells into a greased 8×8 dish.
4. Top the shells the remaining 1/4 cup of Frank’s and 1/2 cup of shredded cheese.
5. Bake for 10-15 minutes, until the cheese is melted and bubbling.

Leftoverpalooza

Thanksgiving this year was the very first time in my 26 years that I didn’t have turkey. While I was convinced the temptation would be too much and I’d cave as the bird was being carved, I managed to stay true to my new vegetarian lifestyle! I even went so far as to make my very own stuffing. The stuffing that is always made includes sausage, so I subbed the meat version for some veggie sausage, and couldn’t even tell the difference. Matter of fact, my co-workers didn’t notice either, and voted me to a 2nd place tie during our office Thanksgiving on Tuesday.

Whether you eat meat or not, I thought it would be helpful to round-up some left0ver ideas. I’m not usually one for “round-up” posts, as I find they’re boring and repetitive… but once in awhile I find one that I appreciate. Of course, in preparation for Thanksgiving there were a ton – recipe ideas, decoration tips, workouts to help you beat the bulge, etc. But what about once the guests are gone?! If you’ve ever hosted Thanksgiving, you know that aside from hosting, figuring out what to do with all the leftovers can be just as daunting of a task. I’ve hosted quite a few times, so there are a few recipes I’d like to share with you to help you clear out the fridge!

First up: Thanksgiving Leftover Casserole

The great thing about this “recipe” is that you can really use whatever you have on hand. It reminds me of the infamous Thanksgiving dinner sandwich, except in casserole form. You can pile it all into a baking dish, set it in the oven, and you have yourself a hodgepodge of Thanksgiving dinner all in one happy dish. This would even be good without the turkey!

Next is Turkey Noodle Soup!

As the weather is getting cooler (kind of), who doesn’t like a good soup? Of course you could take the time to use the turkey carcass to make a soup, but after slaving in the kitchen for hours on Thanksgiving, who wants to be bothered? This is a quick and easy soup, again using ingredients you already have on hand. Pair this with some leftover dinner rolls and you’ve got yourself a solid meal!

And finally, Crunch Turkey Quesadilla .

No round-up of recipes from me would be complete without something involving a tortilla of sorts. While I don’t have a picture since it was from early in my blogging days when I didn’t understand the importance of text + pictures, I promise it’s delicious. I think cranberry sauce would be an excellent “salsa!”

So, there you have it… three of my favorite post-Thanksgiving recipes. There are so many great things you can make from leftovers, and I’m sure I will discover more this year. I hope everyone had a great day with family and friends, and if you’re shopping today, are staying sane. I’m laying low today and Turkey Trotting on Saturday!

Don’t forget to enter my Under Armour giveaway! You have until Monday 11/26.

Do you have any favorite post-Thanksgiving recipes?
Did you (or will you) turkey trot over the holiday? How’d it go?


Creamy Tomato Soup

When I was working from home because of Hurricane Sandy, I made sure to watch as much morning television as possible (you know, The Today Show, Live with Kelly & Michael, Rachael Ray, etc.). While most of the stuff wasn’t worth mentioning, they did have Ina Garten from Barefoot Contessa on The Today Show one morning which immediately caught my attention. She made a few different things for the segment, but the one that really stood out was her tomato soup. I’m not typically a tomato soup fan since most of the kinds I’ve had just tasted like hot tomato juice, but I was willing to give hers a try.

Since our oven has been out of commission, everything I’ve been making has been either on the stove-top, or in the toaster oven. So this soup was perfect, and it paired amazingly with grilled cheese. But not just any grilled cheese – grilled gouda (my absolute favorite) with sautéed red onion and BBQ sauce. I wound up making quite a few modifications to the soup to fit my taste, and it was so delicious. The entire thing can be completed in one pot, in a matter of about 30 minutes. That’s pretty good for a flavorful homemade soup if you ask me! I’m definitely making this again (and the grilled cheese)!

Creamy Tomato Soupinspired by Ina Garten’s Easy Tomato Soup
– serves about 6 –

Ingredients:
2 Tbsp olive oil
1 yellow onion, diced
3 garlic cloves, minced
2 14 oz. cans of vegetable broth
1 28oz. can crushed tomatoes
1/2 cup heavy cream
1-2 tsp red pepper flakes (depending on your spice preference)
1 tsp dried basil
Salt & pepper to taste

Directions:
1. In a large pot over medium heat, add the oil and diced onion and sauté for about 10 minutes, until they’re translucent and starting to brown. Add the minced garlic and cook an additional 2 minutes.
2.  Stir in the vegetable broth, tomatoes, red pepper flakes, basil, salt, and pepper. Let it simmer for about 10 minutes. 
3. Stir in the heavy cream and let it simmer for an additional 5 minutes, stirring frequently.  

Do you have a favorite type of soup? Or one you can’t stand?

Another Week

It’s been a week since superstorm Sandy touched down in the greater tri-state area and wreaked havoc. A week of working from home, running as much as possible, and trying to keep up with the news while simultaneously trying to keep my tears at bay. It’s hard to believe that places I grew up and know so well have been forever changed; and more importantly than that, the friends and family that have had their lives changed as well. As I mentioned last week, I was lucky enough to retain power through the storm and not to suffer any damages myself. My office, as well as my parents, however, haven’t had power since late Sunday, with reports of it not coming back until the end of this week. While it’s easy to get angry at a lack of heat and power, in the grand scheme of things, it could be much worse.

That being said, even though our oven isn’t working, I’ve been cooking up a storm. My most recent creation was vegan buffalo lasagna. All my GI woes have gotten a little better, and while going gluten-free didn’t seem to make a difference, my doctor has suggested I lay low on dairy. I’m still eating dairy, just a lot less. At my last appointment when trying to figure out why I wasn’t getting much better, I just so happened to mention that I loved cheese, and I watched my doctor immediately scribble that information on his legal pad, with exclamation points to follow the statement. Things have been going better, but I’ve also upped my medicine, so we’ll see what happens when I start to dial the medicine back. So, to cater to my new reduced dairy diet and vegetarianism, this particular recipe is dairy and meat free! You can use regular cheese and dressing (and of course add in chicken), but you should give this version a try!

Vegan Buffalo Lasagna
– Serves 4 –  

Ingredients:
1 block firm tofu
2 Tbsp nutritional yeast
1 cup Frank’s red hot
1 cup vegan Ranch dressing (i.e. Follow Your Heart)
8 oz. vegan shredded mozzarella cheese (i.e. Daiya)
9 “no boil” lasagna noodles

Directions:
1. Press the tofu to get out as much water as possible.
2. Meanwhile, combine the Frank’s and ranch dressing together in a bowl.
3. In a separate large bowl, break up the tofu using a fork until it resembles ricotta cheese.
4. Add in the nutritional yeast and 1/2 cup of the dressing mixture, stirring to combine.
5. Take 4-6 tbsp of the dressing mixture to generously coat the bottom of your slow cooker.
6. Layer 3 no boil noodles, followed by 1/3 cup of the tofu mixture, and a 1/4 cup of the mozzarella cheese. Repeat.
7. After adding the last 3 noodles, pour the remainder of the dressing mixture, being sure to coat everything. Top with the remaining cheese.
8. Cook on high in the slow cooker for 2 hours.